Effortless Beginner Sourdough Bread: No Stress Method Unveiled
Introduction
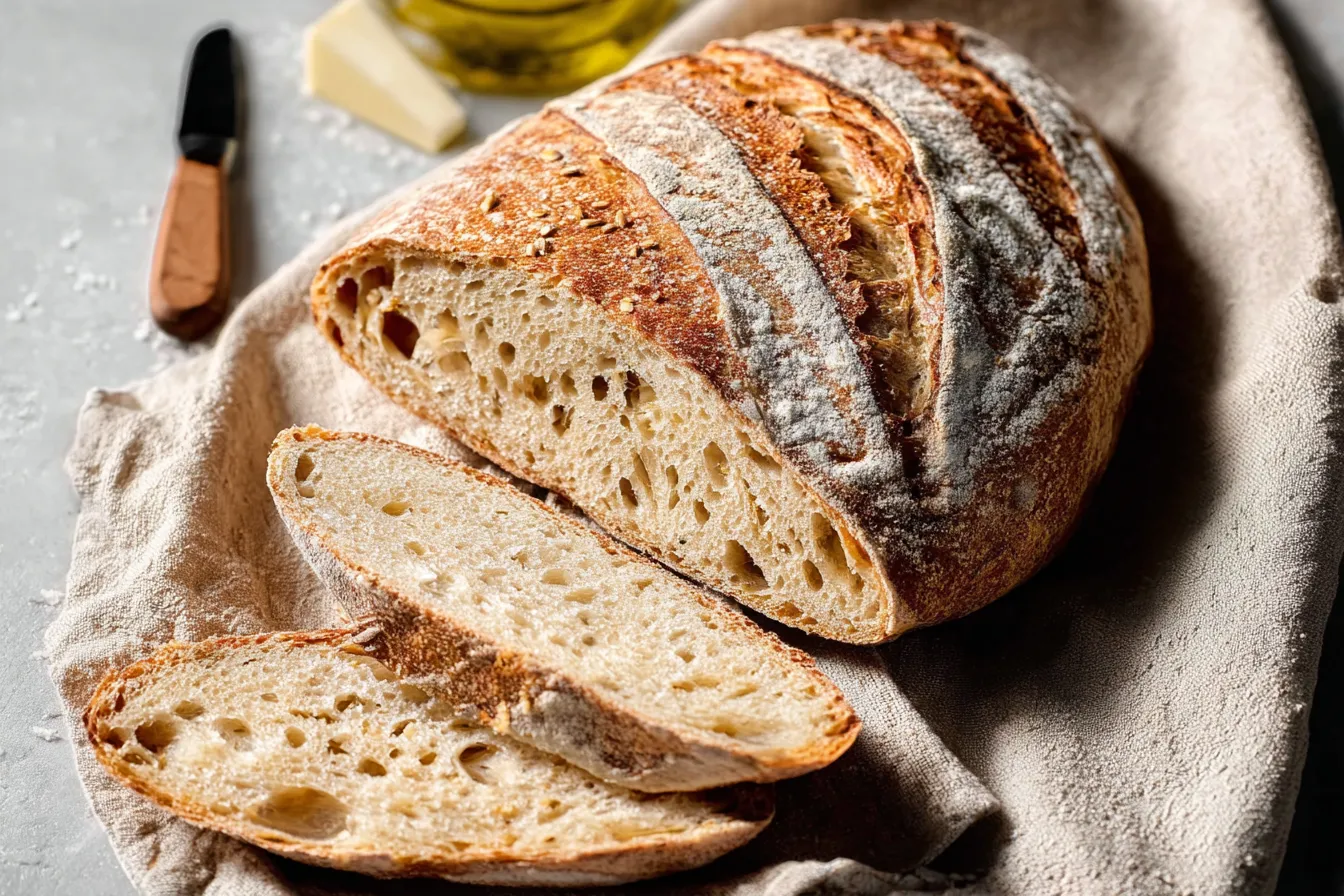
Have you ever wondered why sourdough bread has become a beloved staple in homes worldwide? With the rise in home baking, making sourdough bread is now more accessible than ever. This Beginner Sourdough Bread recipe, using a no-stress method, will challenge the common belief that creating a perfect loaf is daunting and complicated. In just a few simple steps, you’ll find yourself creating a beautifully crusty, tangy bread that may just become your go-to recipe.
Ingredients List
Here’s what you’ll need to whip up your own sourdough bread like a pro:
- 500g bread flour: A high-gluten flour ensures a chewy and airy texture.
- 350g water: Use lukewarm water to help your starter activate better.
- 100g active sourdough starter: Make sure it is bubbly and at its peak. If you’re in a pinch, a store-bought starter can work too.
- 10g salt: Enhances flavor and strengthens gluten.
For substitutions, you can try:
- Whole wheat flour instead of bread flour for a nuttier flavor.
- Filtered water to avoid any chlorine that might inhibit yeast.
- Reduce salt to 5g if preparing a low-sodium dish.

Timing
Preparing this sourdough bread takes approximately:
- Preparation Time: 30 minutes
- Fermentation Time: 6 to 12 hours (ideal for overnight)
- Baking Time: 40 minutes
- Total Time: Around 7 to 13 hours, which is significantly less than the average sourdough recipe.
This timeframe makes it easier for even the busiest of bakers to fit this delicious project into their schedule!
Step-by-Step Instructions
Step 1: Mix Ingredients
In a large mixing bowl, combine the flour, water, and your bubbly sourdough starter. Mix until no dry flour remains. Let the mixture rest for about 30 minutes. This process, known as autolyse, helps develop the gluten.
Step 2: Add Salt
After resting, sprinkle the salt over the dough. Wet your hands and start folding the dough onto itself to integrate the salt. This should take about 3-4 minutes. Don’t worry about overworking it; the dough will come together nicely.

Step 3: Bulk Fermentation
Cover the bowl with a damp cloth and let it ferment in a warm place for 6 to 12 hours. This longer rise will help the dough achieve its signature texture and flavor. During this time, perform stretch and folds every 30 minutes for the first 2 hours to strengthen the dough.
Step 4: Shape the Dough
After the bulk fermentation, flour your work surface and gently dump the dough out. Shape it into a round loaf by tucking the edges into the center. Let it rest for about 30 minutes to relax the gluten.
Step 5: Final Shaping
After resting, perform a final shaping by cupping your hands around the dough and twisting to create surface tension. Place the shaped loaf seam-side up in a floured proofing basket or bowl lined with a kitchen towel.
Step 6: Second Rise
Let the loaf rise for about 1 to 2 hours at room temperature or in the refrigerator for overnight (this option can enhance flavor). If using the refrigerator, take it out and let it sit at room temperature for about 30 minutes before baking.
Step 7: Bake the Bread
Preheat your oven to 450°F (230°C) with a Dutch oven inside. Carefully remove the Dutch oven, and place a parchment paper over your shaped dough before flipping it onto the parchment. With a sharp knife or razorblade, score the top of the bread to allow it to expand as it bakes. Place the loaf into the hot Dutch oven, cover with the lid, and bake for 30 minutes. Then, remove the lid and bake for an additional 10 minutes until golden brown.
Step 8: Cool and Enjoy
Once baked, transfer the bread onto a wire rack and allow it to cool for at least 30 minutes before slicing. This waiting period is crucial, as it allows the crumb to set, enhancing the texture.

Nutritional Information
Here’s the approximate nutritional information for one slice (assuming the loaf yields 15 slices):
- Calories: 110
- Carbohydrates: 22g
- Protein: 3g
- Fat: 0.4g
- Fiber: 1g
- Sodium: 200mg (with added salt)
Healthier Alternatives for the Recipe
To make this sourdough bread even more nutritious, consider these modifications:
- Use a blend of whole wheat flour and bread flour, which increases fiber and nutrients.
- Integrate seeds or grains, such as flaxseeds or rolled oats, for added texture and health benefits.
- Consider sourdough made with gluten-free flour, like sorghum or brown rice flour, for those with gluten sensitivities.
These small changes can significantly enhance the health profiles of your loaf without sacrificing flavor.
Serving Suggestions
Once you’ve achieved the perfect sourdough loaf, you won’t want to keep it all to yourself! Consider these delightful serving suggestions:
- Toast: Serve with avocado, a poached egg, and a sprinkle of chili flakes for a delicious breakfast.
- Sandwiches: Create gourmet sandwiches with your favorite deli meats, cheeses, or roasted vegetables.
- Snacks: Enjoy as a side with your favorite soup or stews; its crusty exterior will complement the meal beautifully.
Feel free to get creative and personalize your servings to suit any occasion or gathering!
Common Mistakes to Avoid
As you embark on your sourdough journey, steer clear of these common pitfalls:
- Using an inactive starter: Ensure your starter is bubbly and has been fed regularly.
- Skipping the autolyse: This step is crucial for developing gluten, so don’t rush it!
- Baking in a cold oven: Preheating is vital to achieving the best crust.
- Slicing too early: Always allow the bread to cool to prevent a gummy texture.
By paying attention to these details, you’ll set yourself up for sourdough success!
Storing Tips for the Recipe
To keep your sourdough bread fresh:
- Store it in a paper bag at room temperature for up to 2 days, or wrap it in plastic after it cools completely and store in the fridge for a week.
- For longer storage, slice and freeze the bread in airtight bags. It can stay fresh for a few months, and you can toast slices directly from the freezer!
These methods will help maintain the full flavor and texture of your homemade sourdough.
Conclusion
With this no-stress method, making your own sourdough bread is not only achievable but also immensely satisfying. You’ve learned the essential steps, alternative options for healthier ingredients, and creative serving ideas. Try it out today, and don’t forget to leave your comments or feedback below!
For more easy-to-follow recipes and tips, subscribe to our blog for updates and fresh content!
FAQs
A: What if my sourdough starter isn’t bubbling?
Ensure it has been fed regularly and is at room temperature. If it’s still not bubbling, consider refreshing it with equal parts flour and water and allowing it to sit for a few hours before using.
B: Can I use bread flour with lower protein content?
A lower protein bread flour might yield a denser loaf. Aim for a flour with at least 12% protein to achieve the airy texture characteristic of sourdough.
C: How do I know when my dough has fermented enough?
The dough should have risen visibly, appear puffy, and have bubbles forming on the surface. It should also have a pleasant, slightly sour smell indicating proper fermentation.
D: Is it normal for my sourdough loaf to sink after baking?
A sinking loaf often indicates either over-proofing or a low oven temperature. Ensure your dough is properly shaped and that your oven is fully preheated before baking.
Print
Effortless Beginner Sourdough Bread: No Stress Method Unveiled
- Total Time: 13 hours
- Yield: 15 slices 1x
Description
Discover the no stress method for effortless beginner sourdough bread. Learn techniques for a delicious homemade loaf easily. Enjoy baking today! (153 chars)
Ingredients
Instructions
Notes
This Beginner Sourdough Bread recipe, using a no-stress method, will challenge the common belief that creating a perfect loaf is daunting and complicated.
- Prep Time: 30 minutes
- Cook Time: 40 minutes
- Category: Bread
- Cuisine: American
Nutrition
- Serving Size: 15 slices
- Calories: 110
- Sugar: 0g
- Fat: 0.4g
- Carbohydrates: 22g
- Fiber: 1g
- Protein: 3g