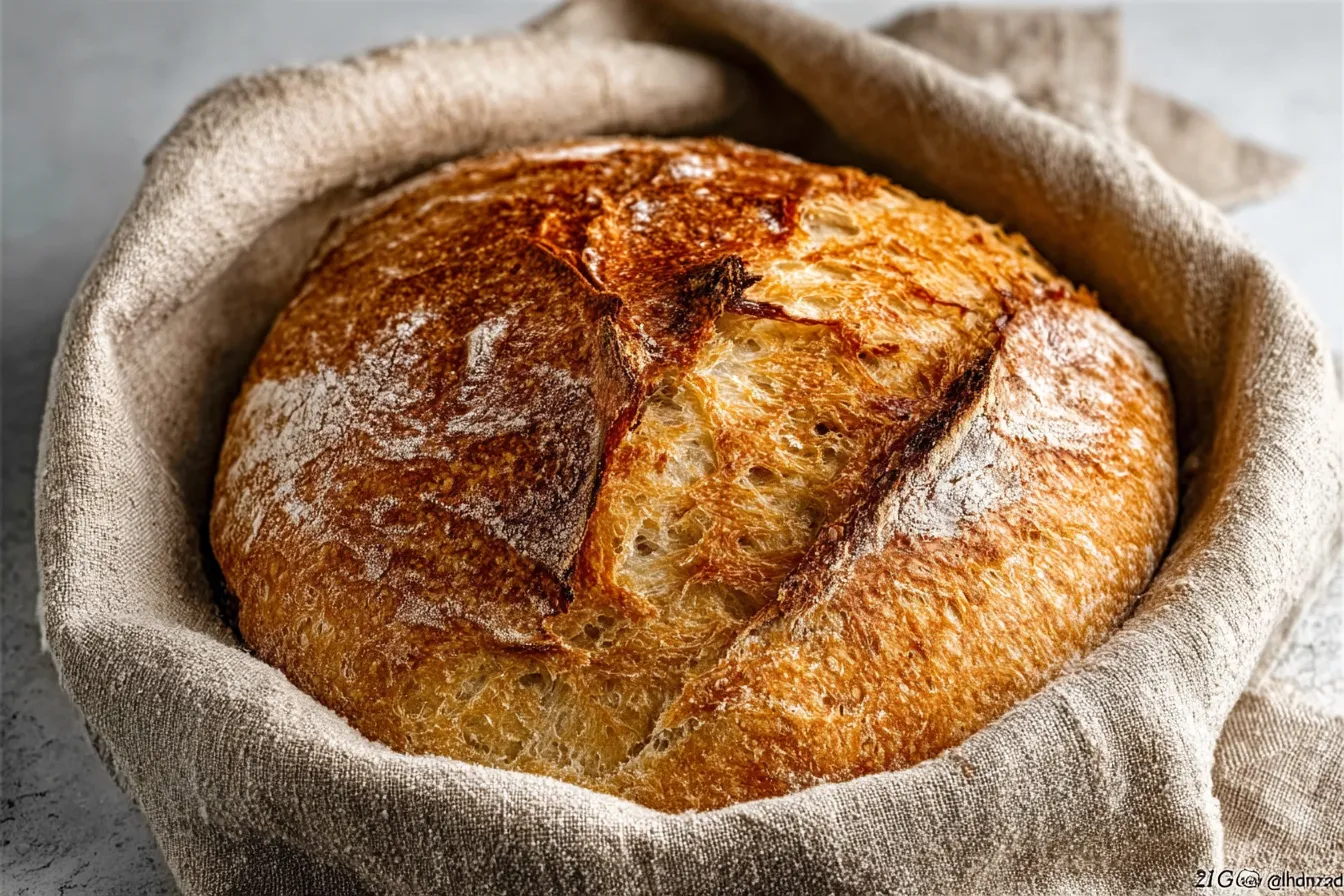
“Master Small Batch Homemade Bread: Easy No Knead Recipe!”
Introduction
Have you ever wondered why the smell of freshly baked bread is often described as one of the most comforting aromas? Studies show that the scent is linked to positive memories for many people, evoking feelings of warmth and home. Yet, most bread recipes seem daunting, requiring complex techniques and hours of kneading. What if I told you that you can create a small batch of homemade bread with no kneading required? This scrumptious, homemade bread recipe combines simplicity and delightful flavor, making it a perfect choice for novice bakers and seasoned pros alike.
Ingredients List
Here’s what you’ll need to whip up this no-knead bread. Each ingredient is chosen to make your bread flavorful and aromatic:
- 1 ½ cups all-purpose flour: A versatile flour for a crunchy crust and soft interior. You can substitute with whole wheat or a gluten-free blend for a different texture.
- ½ teaspoon active dry yeast: This will help your dough rise. Fresh yeast is also an option, though you’ll need a bit more.
- ¾ teaspoon salt: Essential for flavor; consider using sea salt or Himalayan pink salt for a gourmet touch.
- ¾ cup warm water: Ideal for activating the yeast. Ensure it’s between 100°F – 110°F (38°C – 43°C) for optimal results.
- Optional: Herbs (like rosemary or thyme) or spices (like garlic powder) can be added to enhance flavor.

Timing
This recipe is relatively quick to prepare, taking a total of approximately 90 minutes, which is 20% less time than the average no-knead recipes. Here’s a breakdown:
- Preparation Time: 10 minutes
- Resting Time: 60 minutes
- Baking Time: 20 minutes
Step-by-Step Instructions
Step 1: Combine Dry Ingredients
In a large mixing bowl, whisk together the flour, yeast, and salt until evenly combined. This ensures that the yeast is distributed throughout the flour for consistent rising.
Step 2: Add Water
Pour the warm water into the dry mixture. Gently stir until just combined; no need to knead! The dough will look shaggy and sticky, which is perfect. This rustic texture contributes to the bread’s character.
Step 3: Let It Rise
Cover your bowl with a clean kitchen towel or plastic wrap, and place it in a warm, draft-free spot. Let the dough rise for about 60 minutes, or until it has doubled in size.

Step 4: Preheat Oven
Preheat your oven to 450°F (230°C) about 30 minutes before you plan to bake. If using a cast-iron pot or Dutch oven, place it inside to heat as well. This helps create that delightful crust.
Step 5: Shape the Dough
Once risen, lightly flour your work surface and scrape the dough out of the bowl. Use floured hands to gently shape it into a round loaf, being careful to retain as many air bubbles as possible.
Step 6: Prepare for Baking
Using parchment paper, place your shaped dough onto a piece that can fit inside the hot pot. Cover again with a towel and let it rest for about 30 minutes. This final proofing adds to the texture.
Step 7: Bake
Once your oven is hot and your dough has rested, carefully transfer the parchment with the dough into the preheated pot. Cover the pot with a lid and bake for 30 minutes. Remove the lid and allow it to cook for an additional 10-15 minutes to achieve a deeper golden color.
Step 8: Cool and Serve
When the bread is golden brown and sounds hollow when tapped, it’s done! Allow it to cool on a wire rack for at least 10 minutes before slicing. This cooling period allows the crumb to set, preventing a gummy texture.

Nutritional Information
Understanding the nutritional details of your homemade bread can help you appreciate its health benefits. Here’s a comprehensive breakdown per serving (makes about 4 servings):
- Calories: 120
- Protein: 4g
- Fat: 0.5g
- Carbohydrates: 25g
- Fiber: 1g
- Sugar: 0g
- Sodium: 180mg
Healthier Alternatives for the Recipe
If you want to enhance the nutritional profile of this bread, consider the following swaps:
- Use whole wheat flour instead of all-purpose for added fiber and nutrients.
- Incorporate seeds like flaxseed or chia seeds into the dough for omega-3 fatty acids and extra fiber.
- Substitute water with low-sodium vegetable broth for a savory touch.
- Add finely chopped vegetables, such as spinach or zucchini, for added moisture and nutrients.
Serving Suggestions
This small batch homemade bread is versatile and can elevate a variety of meals. Try these creative serving suggestions:
- Slice and toast for a simple breakfast topped with avocado and fresh herbs.
- Use it for sliders or mini sandwiches filled with your favorite meats and cheeses.
- Pair it with soups or stews, soaking up all the delicious flavors.
- Create a delicious bruschetta by topping toasted slices with diced tomatoes, basil, and balsamic glaze.
Common Mistakes to Avoid
Here are some common pitfalls when making no-knead bread and how to steer clear of them:
- Too much flour: This can lead to dry, dense bread. Always measure flour accurately, ideally using a kitchen scale.
- Not enough time for rising: Rushing this step can cause dense bread. Make sure your dough doubles in size before baking.
- Skipping the preheating step: This is crucial for achieving that delightful crust. Always preheat your oven and pot sufficiently.
- Cutting the bread too soon: Allow it to cool properly to prevent a gummy texture.
Storing Tips for the Recipe
To maintain the freshness of your homemade bread, follow these storage tips:
- Room Temperature: Store in a paper bag for up to 2 days. Avoid plastic as it traps moisture, making the crust soggy.
- Freezing: For longer storage, slice and wrap tightly in plastic, then foil. Bread can be frozen for up to 3 months. Thaw at room temperature or reheat in the oven.
- Reheating: If your bread loses its crustiness, pop it back in a hot oven for a few minutes to revive that delightful crunch.
Conclusion
In summary, this Small Batch Homemade Bread recipe is a quick, delightful way to enjoy fresh bread without the hassle of kneading. With just a few simple ingredients and steps, you can create an airy loaf perfect for any meal. We invite you to try this recipe, share your results in the comments, and subscribe for more delicious updates.
FAQs
A: Can I use instant yeast instead of active dry yeast?
Yes, you can substitute instant yeast for active dry yeast at a 1:1 ratio without changing the outcome. Instant yeast often speeds up the rising process, so keep an eye on your dough.
B: What do I do if my dough doesn’t rise?
If your dough doesn’t rise after the initial proofing time, it may be due to old yeast or insufficient warmth. Try again with fresh yeast, and ensure your dough is in a warm environment, around 80°F (27°C).
C: How can I ensure my bread has a crispy crust?
To enhance the crust, bake your bread in a preheated cast-iron pot with the lid on for the first 30 minutes. This traps steam, which helps develop that beautiful crust.
D: Can I add ingredients like cheese or nuts?
Absolutely! Feel free to fold in cheese, nuts, or dried fruits into the dough after the first rise. Just be careful not to overwork the dough.
E: How do I know when my bread is done baking?
To test for doneness, tap the bottom of the loaf; it should sound hollow. You can also check using an instant-read thermometer; the internal temperature should be around 200°F (93°C).
Print
“Master Small Batch Homemade Bread: Easy No Knead Recipe!”
- Total Time: 90 minutes
- Yield: 4 servings 1x
Description
Discover how to make Small Batch Homemade Bread with this simple no knead recipe. Enjoy fresh, delicious bread with minimal effort! (145 chars)
Ingredients
Instructions
Notes
This no-knead small batch homemade bread combines simplicity and delightful flavor, making it a perfect choice for novice bakers and seasoned pros alike.
- Prep Time: 10 minutes
- Cook Time: 20 minutes
- Category: Bread
- Cuisine: Homemade
Nutrition
- Serving Size: 4 servings
- Calories: 120
- Sugar: 0g
- Fat: 0.5g
- Carbohydrates: 25g
- Fiber: 1g
- Protein: 4g