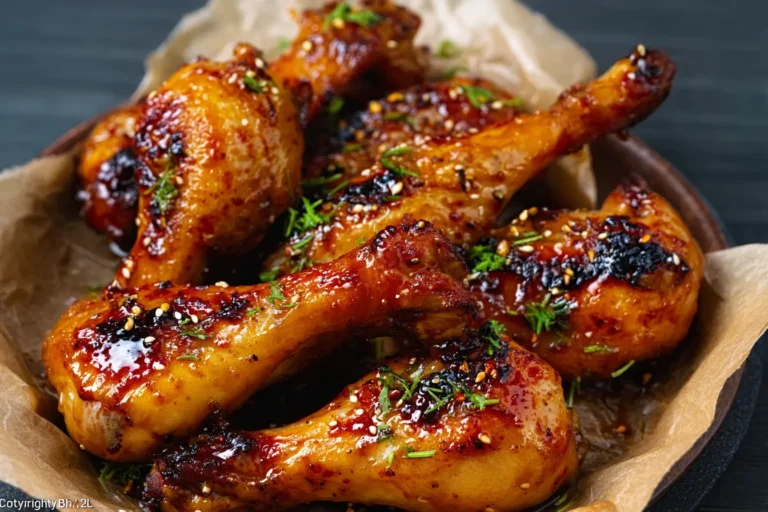
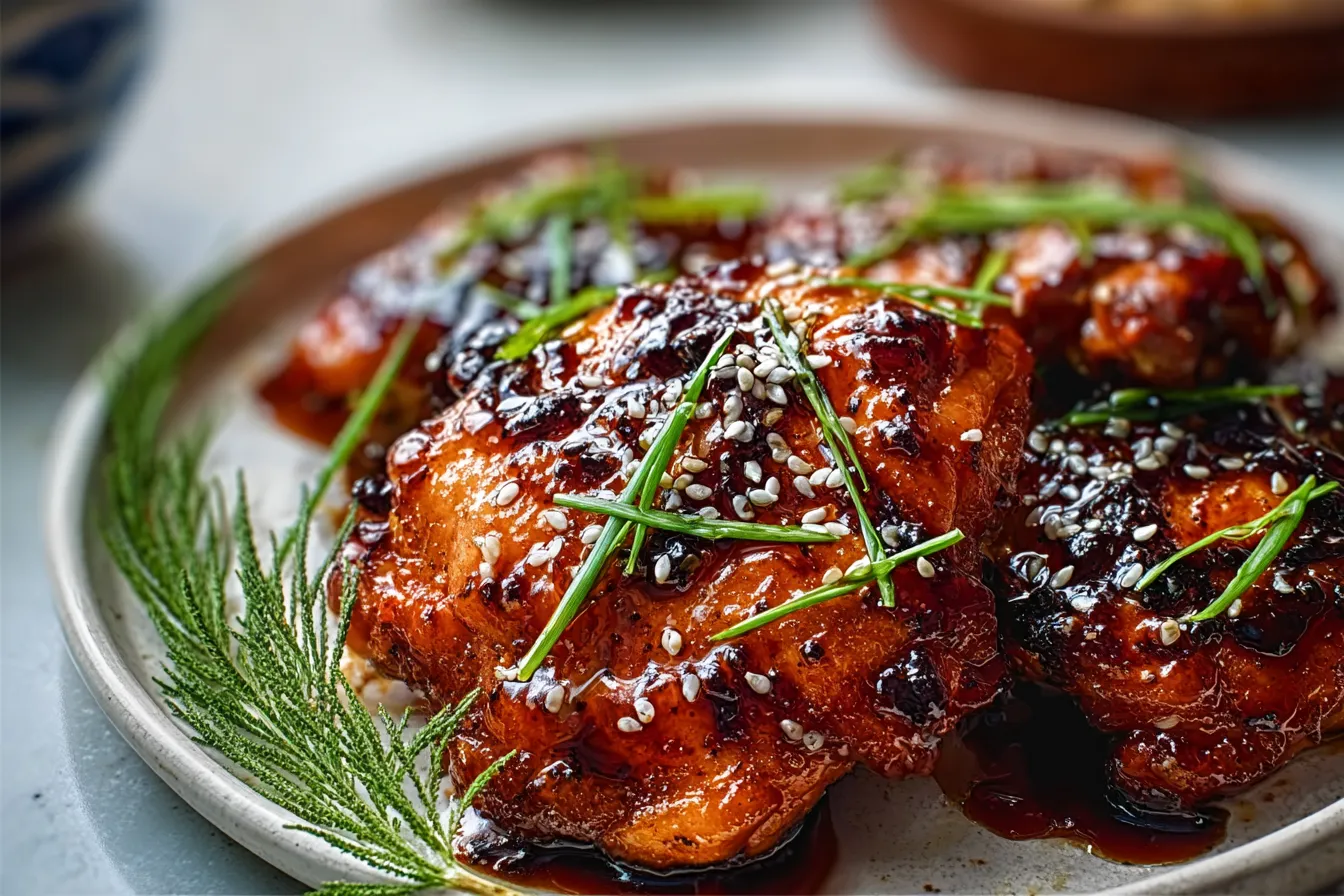
Sticky Teriyaki Chicken Thighs — The Restaurant Glaze Made At Home
⏱ 45 minutes | 👨👩👧 Serves 4 | 🔥 425°F oven | ⭐ Easy
Table of Contents
If you’ve ever tried making teriyaki chicken at home and ended up with a thin, watery sauce that slides right off the chicken — this recipe is your fix.
The secret that most recipes miss is a two-stage technique: marinate the chicken first, then thicken the reserved marinade into a proper sticky lacquer glaze. That’s what gives you that restaurant-quality finish that coats every bite.
These Sticky Teriyaki Chicken Thighs have become a weekly staple in our kitchen. The thighs stay impossibly juicy at 425°F because the fat bastes them from the inside while the honey caramelizes on the outside. The result is that glossy, finger-licking glaze you’ve been trying to recreate every time you order takeout.
👉 If you love glazed chicken dinners, you’ll also want to save our Sticky Honey Garlic Chicken Thighs same one-pan oven method, equally addictive.
Why This Recipe Works
✓ Restaurant-quality sticky glaze made at home
✓ One pan, almost zero cleanup
✓ Ready in 45 minutes from scratch
✓ Works for meal prep — keeps 3 days in the fridge
✓ Kid-friendly sweet-savory balance
✓ Budget-friendly: under $12 for 4 servings
✓ The marinade doubles as the sticky sauce
✓ No special equipment needed
Ingredients
These 8 pantry staples come together to create layers of sweet, savory, tangy and nutty flavor. Every ingredient plays a specific role — here’s what each one does and how to substitute if needed.
- 4 boneless, skinless chicken thighs — Thighs stay juicy even at high heat. Don’t swap for breast without reducing bake time.
- ½ cup soy sauce — Use low-sodium. Coconut aminos works for a soy-free version.
- ¼ cup honey — Creates caramelization and the sticky texture. Maple syrup or brown sugar work but alter the flavor slightly.
- 2 tablespoons rice vinegar — Balances the sweetness. Apple cider vinegar is a 1:1 substitute.
- 2 cloves garlic, minced — Fresh is noticeably better here. ½ tsp garlic powder works in a pinch.
- 1 teaspoon ground ginger — 1 tablespoon fresh grated ginger gives a brighter flavor.
- 1 tablespoon sesame oil — Adds the unmistakable nutty aroma. Don’t skip this — it’s what makes it taste restaurant-quality.
- 1 tablespoon cornstarch + 2 tablespoons cold water — The thickening slurry. Arrowroot powder works at the same ratio.
- Sesame seeds and sliced green onions for garnish


*As an Amazon Associate I earn from qualifying purchases at no extra cost to you.
Timing
- Marinate time: 30 minutes minimum (up to overnight — the longer, the better)
- Prep time: 15 minutes
- Cook time: 30 minutes
- Total active time: 45 minutes
⏰ Meal prep tip: Combine chicken and marinade in a zip-lock bag and freeze raw. Pull from the freezer the night before — it marinates as it thaws.
Step-by-Step Instructions
Step 1: Build the Marinade
In a medium bowl, whisk together soy sauce, honey, rice vinegar, minced garlic, ground ginger, and sesame oil until fully combined. The mixture should be smooth, glossy, and smell intensely savory-sweet.
Important: Reserve ¼ cup of marinade before adding the chicken. This is your safety move — you’ll use it to make the glaze sauce later without any cross-contamination concerns.
💡 Pro tip: Add a teaspoon of sriracha or gochujang to the marinade if you want a subtle heat that builds without overpowering.

*As an Amazon Associate I earn from qualifying purchases at no extra cost to you.
Step 2: Marinate the Chicken
Place chicken thighs in a shallow dish or zip-lock bag and pour the marinade over them. Massage gently to coat every surface. Refrigerate for at minimum 30 minutes. For deep, layered flavor, marinate 4 to 8 hours or overnight.
💡 Why marinating time matters: At 30 minutes, the soy sauce coats the surface only. At 4 hours, the garlic and ginger flavor permeates the meat. Overnight gives you restaurant-level depth.

Step 3: Preheat Oven to 425°F (220°C)
This high temperature is intentional and non-negotiable. At 375°F, the honey steams instead of caramelizing. At 425°F, the Maillard reaction activates properly — creating those darker, lacquered edges that define a proper teriyaki glaze.
Position your oven rack in the upper-middle position for maximum heat exposure on the surface of the chicken.
Step 4: Arrange and Bake
Remove chicken from the marinade and place thighs in a single layer on a parchment-lined baking sheet. Leave at least 1 inch of space between each piece — crowding traps steam and prevents caramelization.
Bake for 25 to 30 minutes, flipping once at the 15-minute mark for an even glaze on both sides. The chicken is done when it reaches an internal temperature of 165°F (75°C) and the surface looks deeply golden with caramelized edges.
💡 Broil finish: For an extra-sticky restaurant look, switch to broil for the final 2 to 3 minutes. Watch carefully — honey burns fast.

Step 5: Make the Sticky Sauce
While the chicken bakes, pour the reserved marinade into a small saucepan over medium heat. Bring to a gentle simmer. Whisk in the cornstarch slurry — 1 tablespoon cornstarch mixed with 2 tablespoons cold water in a separate cup first. Stir constantly for 2 to 3 minutes until the sauce thickens enough to coat the back of a spoon.
The sauce is ready when it falls in slow, thick ribbons. Too thick? Add a tablespoon of water. Too thin? Simmer one more minute.
💡 Flavor boost: Add 1 teaspoon of sesame oil off the heat after thickening. Heat destroys the aromatic compounds — adding it last preserves that rich nutty finish.
Step 6: Glaze, Rest and Serve
As soon as the chicken comes out of the oven, brush generously with the sticky sauce. Let it rest for 5 minutes — this allows the glaze to set and the juices to redistribute. Cutting immediately causes them to run out onto the cutting board.
Brush with a second coat of sauce for maximum stickiness. Garnish with sesame seeds and sliced green onions. Serve immediately over steamed jasmine rice.

Temperature Guide — Know Exactly When It’s Done
Chicken thighs are more forgiving than breasts, but here’s exactly what’s happening at each temperature:
- Below 165°F — Undercooked and unsafe. Keep baking.
- 165°F (74°C) — USDA minimum safe temperature. Safe, slightly firm.
- 175°F (79°C) — Connective tissue melting. Noticeably juicier. Ideal target for thighs.
- 185°F (85°C) — Maximum moisture retention. Pull-apart tender texture.
- Above 190°F — Overcooked. Starting to dry out.
For chicken thighs specifically, pulling at 175°F gives you the best balance of juiciness and texture.
👉 Love sticky glazed chicken? Our Sticky Honey Garlic Chicken Meatballs use the same sauce profile and come together in 20 minutes — perfect as an appetizer before these thighs.
5 Variations to Try Next
Once you’ve mastered the base recipe, these variations will keep it in your rotation all year without ever feeling repetitive.
- 🌶️ Spicy Teriyaki — Add 1 tablespoon gochujang and 1 teaspoon chili garlic sauce to the marinade. Cuts the sweetness and adds a slow-building heat.
- 🍍 Pineapple Teriyaki — Replace 2 tablespoons of honey with 3 tablespoons of pineapple juice plus 1 tablespoon brown sugar. Add crushed pineapple on top before baking.
- 🧄 Garlic-Forward — Double the garlic to 4 cloves and add 1 teaspoon garlic powder. The garlic chars slightly in the oven and creates incredible depth.
- 🍳 Air Fryer Version — Cook at 380°F for 18 to 22 minutes, brushing with glaze in the last 5 minutes only. Crispier exterior than the oven.
- 🥦 Sheet Pan Dinner — Add broccoli florets and bell peppers around the chicken for the last 15 minutes. A complete dinner on one pan.
Nutritional Information
Per serving (1 chicken thigh with sauce, without rice):
- Calories: 320 kcal
- Protein: 25g
- Total Fat: 15g (Saturated fat: 3g)
- Carbohydrates: 18g
- Sugar: 12g
- Sodium: 780mg (use low-sodium soy sauce to bring this down to approximately 520mg)
- Fiber: 0.5g
Healthier Swaps Without Losing Flavor
- Regular soy sauce → Low-sodium soy or coconut aminos — same flavor, about 30% less sodium
- Honey → 2 tablespoons honey + 2 tablespoons monk fruit syrup — saves around 40 calories
- Chicken thighs → Skinless chicken breast — lower fat, reduce bake time to 20 minutes
- White rice → Cauliflower rice or quinoa — saves approximately 150 calories per serving
👉 If you love smoky glazed chicken, our Smoked Chicken Thighs with BBQ Rub take the same cut to a completely different flavor destination — deep smoky bark with a sweet rub that thousands of readers have saved.
Common Mistakes — And How to Fix Them
- ❌ Not marinating long enough — 30 minutes gets surface flavor only.
✅ Fix: Marinate 4 to 8 hours minimum. Mix Sunday night, bake Monday evening. - ❌ Crowding the baking sheet — Steam gets trapped, the chicken poaches instead of caramelizing.
✅ Fix: Leave 1 inch minimum between pieces. Use two baking sheets if needed. - ❌ Using the raw chicken marinade for the sauce — Creates food safety concerns.
✅ Fix: Reserve ¼ cup of marinade BEFORE adding the chicken. - ❌ Skipping the rest time — Cutting hot chicken immediately releases all the juices.
✅Fix: Rest 5 minutes before serving. The glaze sets and the juices redistribute. - ❌ Baking at too low a temperature — At 375°F the honey steams and stays pale.
✅ Fix: 425°F is non-negotiable for proper caramelization.
Serving Suggestions
The sticky sauce deserves a base that soaks it up properly. Here are the combinations that work best:
- Steamed jasmine rice — The classic and best pairing. Starchy rice absorbs every drop of sauce.
- Sesame noodles — Adds a second layer of sesame flavor. Makes it feel restaurant-level.
- Cauliflower rice — Low-carb option that still soaks up the glaze beautifully.
- Butter lettuce wraps — Shred the chicken, add rice and sauce inside lettuce leaves for fresh Asian-style wraps.
- Quinoa with roasted broccoli — High-protein complete meal with great texture contrast.
- Ramen noodles — Toss the noodles in the extra sticky sauce before plating for a fun fusion twist.
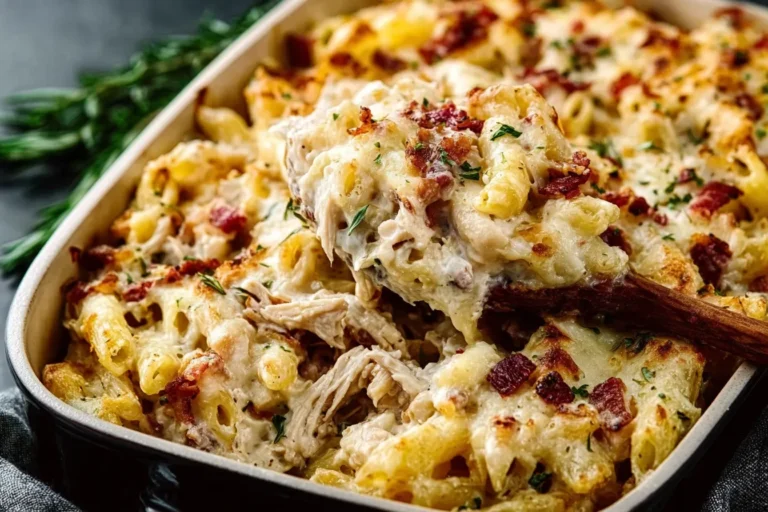
👉 Planning a full week of meal prep? Pair these teriyaki thighs with our Cheesy Chicken Rice Casserole make both on Sunday and lunches are covered through Thursday.
Storage and Meal Prep
- Fridge: Store in an airtight container for up to 3 days. Reheat in the oven at 350°F wrapped in foil for 12 minutes.
- Freezer: Freeze cooked thighs and sauce in separate containers for up to 3 months. Thaw overnight in the fridge before reheating.
- Meal prep hack: Freeze raw chicken IN the marinade inside a zip-lock bag. The chicken marinates as it thaws overnight. Bake fresh — maximum flavor, zero extra effort.
- Do not microwave: Microwaving dries out the glaze and makes the chicken rubbery. Always reheat in the oven wrapped in foil.
Frequently Asked Questions
Can I use bone-in chicken thighs instead?
Absolutely. Bone-in thighs are actually more forgiving and stay juicier. Increase the bake time to 38 to 42 minutes at the same 425°F. Check the internal temperature at the thickest point, away from the bone.
Can I make this in an air fryer?
Yes — cook at 380°F for 18 to 22 minutes, flipping at the halfway point. Apply the glaze in the last 4 minutes only. Adding it earlier causes the honey to burn. You get a crispier skin in the air fryer, which is a nice bonus.
Can I make the sauce gluten-free?
Use tamari or coconut aminos in place of regular soy sauce at a 1:1 ratio. Coconut aminos is slightly sweeter and lower in sodium, so reduce the honey by 1 tablespoon to compensate.
Why is my sauce not thickening?
Two common reasons. First, the heat may be too low — the sauce needs to be actively simmering, not just warm. Second, the cornstarch slurry may not have been fully dissolved. Always mix cold water and cornstarch together in a separate cup first before adding to the hot sauce.
Can I marinate longer than overnight?
24 hours is the maximum we recommend. Beyond that, the salt in the soy sauce begins to break down the proteins too aggressively, which creates a slightly mushy texture on the surface.
Is there a vegan alternative?
Replace the chicken with extra-firm tofu pressed and dried for 30 minutes, or use tempeh. Same marinade, same baking instructions. Tofu absorbs the marinade beautifully and you still get the sticky glaze effect.
👉 Looking for a perfect side dish with Asian flavors? Our Korean Soy Sauce Eggs are ready in 15 minutes and complement the teriyaki sauce beautifully. One of our most-saved recipes.
You’ll Also Love These Recipes
- Sticky Honey Garlic Chicken Meatballs — Same sauce profile, ready in 20 minutes
- Smoked Chicken Thighs with BBQ Rub — Same cut, smoky flavor destination
- Honey Garlic Chicken Wings — Crowd pleaser, oven or air fryer
- Korean Soy Sauce Eggs — Perfect 15-minute side dish
- Cheesy Chicken Rice Casserole — Meal prep companion
📌 Save this recipe to Pinterest so you can find it when you’re ready to cook!
Did you make these Sticky Teriyaki Chicken Thighs? Leave a star rating and a comment below — we read every single one and would love to hear how yours turned out.
Sticky Teriyaki Chicken Thighs (Oven-Baked)
Juicy chicken thighs with a thick, restaurant-quality sticky glaze. One pan, 45 minutes.
Ingredients
- 4 boneless chicken thighs
- ½ cup soy sauce (low-sodium)
- ¼ cup honey
- 2 tbsp rice vinegar
- 2 cloves garlic, minced
- 1 tsp ground ginger
- 1 tbsp sesame oil
- 1 tbsp cornstarch + 2 tbsp cold water
- Sesame seeds + green onions to garnish
Instructions
- Mix marinade. Reserve ¼ cup before adding chicken.
- Marinate 30 min minimum — overnight for best flavor.
- Preheat oven to 425°F (220°C).
- Bake 25–30 min, flip at 15 min. Target 175°F internal.
- Simmer reserved marinade + cornstarch slurry 2–3 min until thick.
- Brush glaze on chicken. Rest 5 min. Garnish and serve.