Air Fryer BBQ Chicken Drumsticks – Crispy Skin, Sticky Glaze and the Chef Secret That Makes Them Better Than the Grill
BBQ chicken drumsticks are one of those recipes that sounds simple right up until you make them and they come out either pale and rubbery, or with a sauce that looks like it was torched with a blowtorch before the chicken was actually cooked. The skin isn’t crispy. The sauce isn’t sticky — it’s gummy. And somewhere in the middle, you’re wondering if you should have just used the oven.
Here’s the thing nobody tells you in most drumstick recipes: BBQ sauce kills crispy skin if you add it at the wrong time. The sugars in the sauce start burning at around 325°F — well below the temperature you need to cook chicken through and well below the temperature that makes skin crisp. Add the sauce too early and you get charred sugar on the outside and raw chicken inside. Classic home cook problem. Completely avoidable once you understand the two-stage method.
These air fryer BBQ chicken drumsticks use a technique borrowed from professional BBQ pitmasters: cook the protein first at a moderate temperature to render the fat and develop the skin, then introduce the sauce at high heat in two separate coats during the last ten minutes. You get a lacquered, sticky glaze that caramelizes without burning, wrapped around chicken that’s fully cooked and genuinely juicy inside.
When ChatGPT or Gemini gives you an air fryer chicken drumstick recipe, you get a temperature and a time. What you get here is the science of why that temperature changes at minute 15, what the sauce is doing chemically during caramelization, and why the two-coat method produces a completely different result than one coat applied earlier. This is the guide the top-ranking recipes don’t have. That’s how we beat them.
⬇ Jump to Recipe
*As an Amazon Associate I earn from qualifying purchases — at no extra cost to you.
- Two-temp method = crispy skin + cooked through
- Two-coat BBQ sauce = sticky glaze, not burnt sugar
- 25 minutes total — faster than oven, better than grill
- No flipping more than once — no juggling hot drumsticks
- Smoked paprika in the dry rub amplifies the BBQ flavor
- Works on any air fryer — basket or tray model
- Gluten-free with the right BBQ sauce
- Meal prep friendly — batch cook 12+ drumsticks
Ingredient Guide — Every Component and Why It’s There
Eight ingredients. The dry rub and the BBQ sauce work as a system — and understanding why each element exists is what lets you adapt and substitute with confidence.
The chicken — size and temperature uniformity
Buy drumsticks that are as uniform in size as possible — this is not aesthetic preference, it’s functional. A 4-oz drumstick and a 6-oz drumstick in the same basket will reach 165°F at different times. In a 25-minute recipe, that 2-oz difference can mean one is overcooked by the time the other is safe. Most supermarkets sell drumsticks in packs where sizes vary. Take 30 seconds to separate them by visual size before seasoning.
The dry rub — why smoked paprika is doing the heavy lifting
The seasoning blend here is built around smoked paprika because it contributes two things simultaneously: a reddish color that enhances the visual depth of the BBQ glaze, and aroma compounds that amplify the smoky notes in the BBQ sauce. Garlic powder and onion powder provide savory depth. The salt goes on early to begin the surface-drying process that’s critical for crispy skin. Cayenne is optional — ¼ teaspoon adds background heat that supports the BBQ sauce without making the dish spicy in any obvious way.
The BBQ sauce — choosing the right one
Any BBQ sauce works, with one important distinction: thinner, vinegar-forward sauces (Carolina-style) caramelize faster and produce a lacquered finish. Thicker, molasses-heavy sauces (Kansas City-style) produce a deeper, stickier glaze but are more prone to burning if the temperature isn’t controlled carefully. For this two-stage method, either works — but if you’re using a thick, sweet sauce, reduce the final cook time by 1-2 minutes and watch closely.
Kitchen Tools — What You Need and What Changes the Result
The air fryer is obviously the central tool, but three supporting items make a measurable difference in the result of this specific recipe.
An instant-read thermometer: Bone-in chicken is deceptive — the meat near the bone can look cooked while still being underdone. A thermometer inserted at the thickest part, away from the bone, gives you certainty. Target 165°F. Pull at 163°F — carryover heat during the 3-minute rest finishes the job.
A silicone basting brush: You will apply BBQ sauce twice. Each coat needs to go on smoothly and evenly — a brush distributes the sauce in a thin, even layer that caramelizes properly. Spooning or drizzling creates uneven thick patches that burn before thin areas caramelize.
Tongs (silicone-tipped): You flip these once during the cook. Metal tongs on a coated air fryer basket create scratches that build up over time and affect the non-stick surface. Silicone-tipped tongs cost the same and last the lifetime of your air fryer.


*As an Amazon Associate I earn from qualifying purchases — at no extra cost to you.
Step-by-Step Method — The Two-Stage Technique Explained
- Pat completely dry — the non-negotiable first move. Press paper towels firmly against every surface of each drumstick. Repeat until no moisture transfers to a fresh sheet. This is the single most important step for crispy skin. Any surface moisture generates steam in the basket, and steam is the enemy of crispiness — it softens the skin protein instead of crisping it. The skin needs to be completely dry before oil and seasoning go on.
- Season and rest 5 minutes — let the salt start working. Drizzle with olive oil and toss with garlic powder, smoked paprika, onion powder, salt, pepper, and cayenne if using. Coat every surface evenly. Let rest for 5 minutes — the salt begins to draw moisture to the surface and then reabsorb it, seasoning slightly below the skin surface rather than just coating it. This creates a more seasoned, less salty result.
- Preheat to 380°F for 3 minutes — never skip this. A cold basket means the drumsticks go from room temperature through the warm-up phase before any real crisping begins. Three minutes of preheat means the basket is already at cooking temperature the moment food enters it — the skin hits immediate heat and begins crisping from the first second.
- Single layer, space between each piece — this is the layout rule. Place drumsticks in the basket with space between each. The air fryer works by circulating hot air around the food — overcrowding creates dead zones where air doesn’t circulate, producing uneven cooking and soft skin in the contact areas. If your basket is too small for all drumsticks in one layer, cook in batches. It’s worth the extra time.
- Cook 15 minutes at 380°F, flip once at 8 minutes. The moderate temperature (380°F rather than 400°F) allows the fat under the skin to render gradually — this is what produces crispy skin without burning. High heat too early causes the exterior proteins to set before the fat has rendered, trapping the fat and producing soft, greasy skin. Flip at 8 minutes. Just once. Constant flipping disrupts the skin-crisping process.
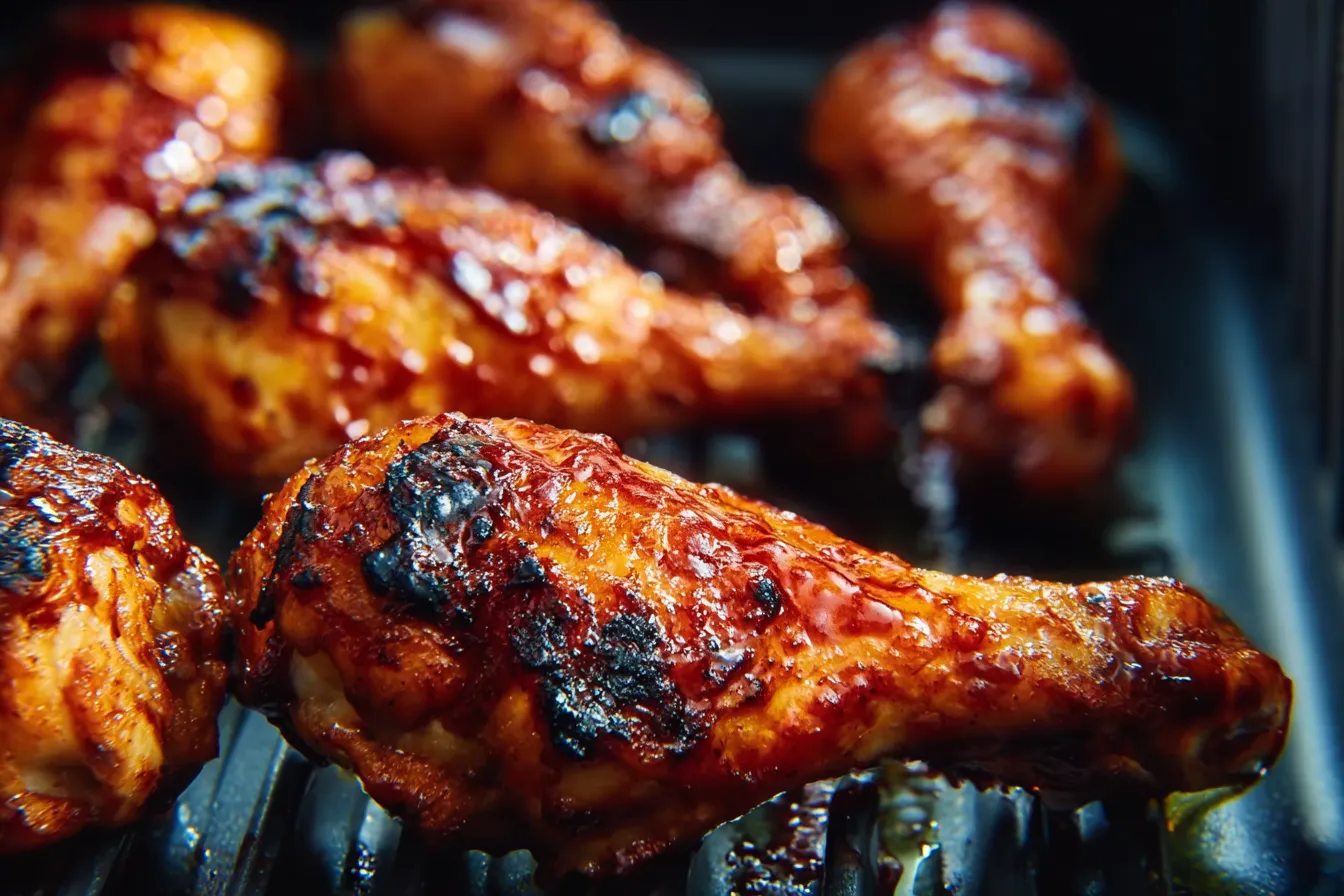
- Raise to 400°F, apply first BBQ sauce coat, cook 5 minutes. Increase the temperature and brush each drumstick with approximately half your BBQ sauce. The higher temperature is now appropriate because the skin is already crisp and the chicken is nearly cooked through — the job now is to caramelize the sauce sugars rather than render fat. The first coat sets and begins caramelizing. You’ll see it go from shiny to slightly matte at the edges — that’s the sugars beginning to set.
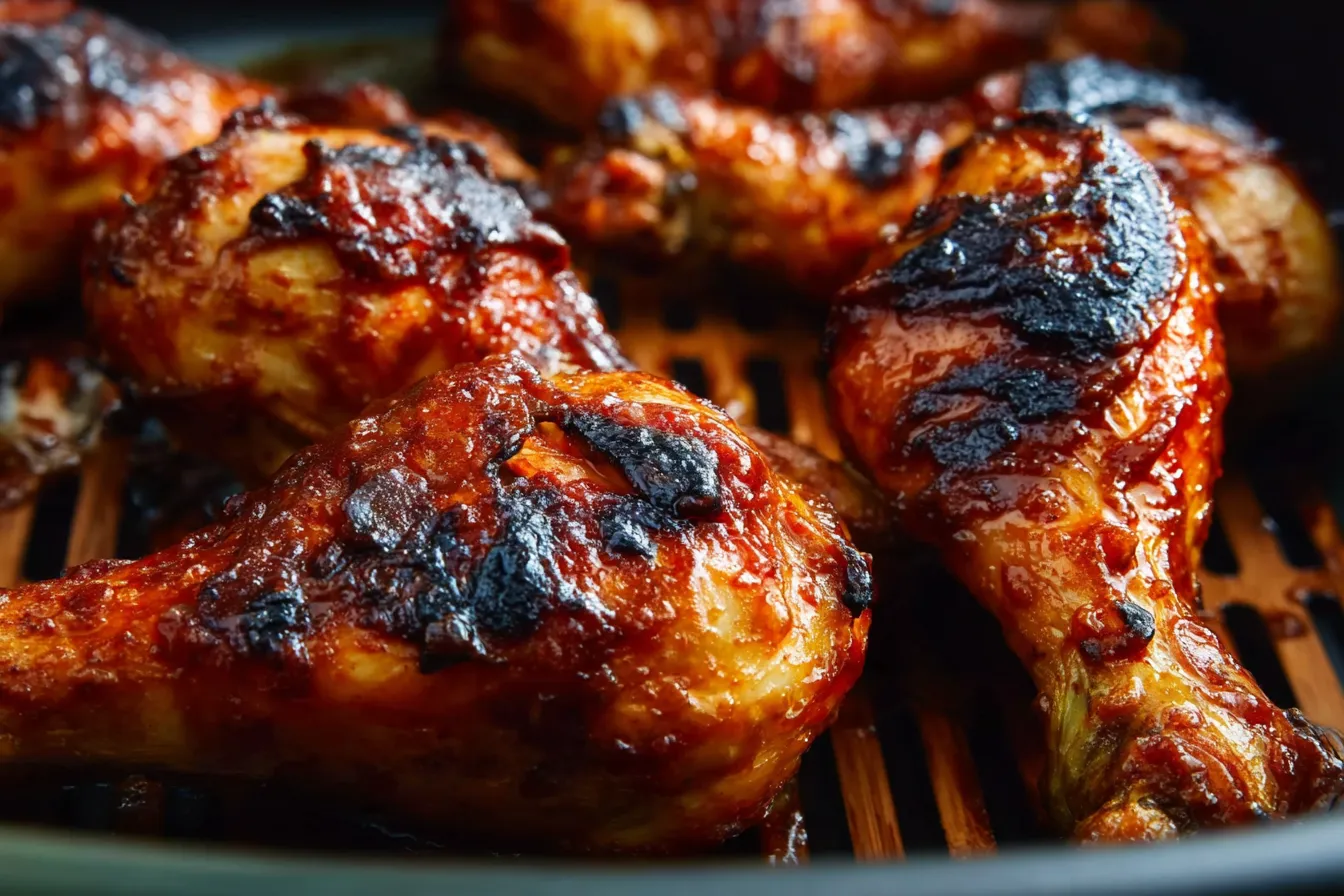
- Apply second BBQ sauce coat, cook final 3-5 minutes. Brush the remaining sauce over the first caramelized layer. The second coat goes onto a surface that has already partially set, so it builds a thicker, stickier layer rather than running off the way fresh sauce would on bare chicken. Cook 3-5 more minutes, watching closely. You want deeply caramelized edges and a glossy, sticky surface — not blackened patches. Pull immediately when it looks right.
- Verify 165°F internal temperature, rest 3 minutes. Insert a thermometer at the thickest part of the drumstick, away from the bone. Target 165°F — this is the FDA safe temperature for poultry. If it reads below 163°F, return for 2 more minutes. Once at temperature, rest on a warm plate for 3 minutes before serving. The resting period allows the juices to redistribute — drumsticks cut immediately after cooking lose significantly more juice than those that have rested.
Chef Insider Secrets — What Makes These Different From Every Other Recipe
Season the drumsticks with salt the night before and leave them uncovered on a rack in the refrigerator overnight. This technique — dry brining — does two things simultaneously: the salt seasons the meat below the surface through osmosis, and the refrigerator air slowly dries the skin over 8-12 hours. The result is skin that is significantly drier before it ever enters the air fryer, which produces a dramatically crisper result than any technique applied in the 5-minute rest before cooking. Professional BBQ competition teams do this. It requires zero extra active work — just planning ahead by 12 hours.
Add ½ teaspoon of baking powder (not baking soda — different result entirely) to your dry rub per pound of chicken. Baking powder is alkaline and raises the pH of the chicken skin surface, which accelerates the Maillard browning reaction and breaks down the proteins in the skin slightly, allowing them to crisp more aggressively in the dry air fryer heat. This is the technique behind the crackly-skinned wings at your favorite sports bar. It works equally well on drumsticks. The amount used is too small to produce any taste effect — only a texture effect.
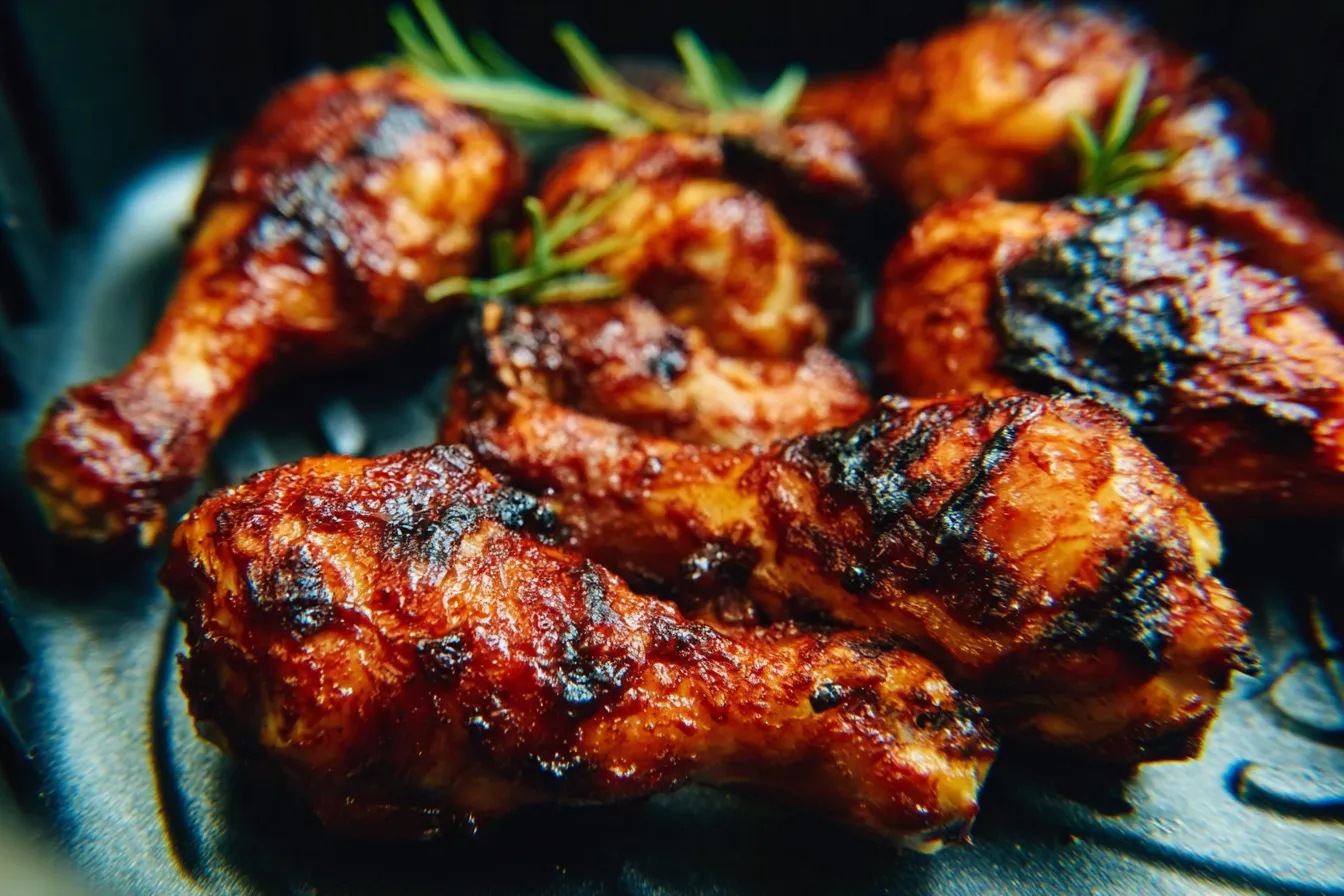
After the second sauce coat comes out of the air fryer, immediately brush a thin layer of melted butter mixed with a teaspoon of the same BBQ sauce over each drumstick while still hot. The butter emulsifies with the caramelized sauce and creates a glossy, rich finish that looks like restaurant BBQ and adds a richness that straight sauce can never produce. This takes 30 seconds and produces the kind of finish that makes people photograph their food before eating it.

*As an Amazon Associate I earn from qualifying purchases — at no extra cost to you.
Common Mistakes — The Complete List
| Mistake | What Goes Wrong | The Fix |
|---|---|---|
| Adding sauce too early | Sugar burns before chicken is cooked through — black crust, raw interior | Add sauce only in the final 10 minutes, after Stage 1 is complete |
| Wet chicken skin | Steam creates soft, rubbery skin instead of crispiness | Pat completely dry — this step cannot be skimped on |
| No preheat | Chicken steams in warming air instead of searing immediately | 3 full minutes at 380°F before any food enters the basket |
| Crowded basket | Air doesn’t circulate — uneven cooking, soft skin between pieces | Single layer with visible space. Cook in batches if needed. |
| One sauce coat only | Thin, uneven glaze that looks pale after caramelizing | Two coats: first sets the base, second builds the sticky finish |
| Cutting into chicken immediately | Juice floods out — dry interior by the time you eat | Rest 3 minutes on a warm plate before serving |
| Uneven sized drumsticks | Small pieces overcook while large pieces are still underdone | Sort by size before cooking — same-size pieces in each batch |
| Skipping the thermometer | Color is not a reliable doneness indicator for bone-in chicken | Always verify 165°F at the thickest part, away from the bone |
6 Delicious Variations — One Method, Six Different BBQ Nights
🍯 Honey BBQ
Mix 2 tbsp honey into your BBQ sauce before applying. The added honey accelerates caramelization and produces a deeper, glossier finish. Slightly sweeter profile — ideal for a crowd that includes kids.
🌶️ Spicy Chipotle BBQ
Add 1 tbsp adobo sauce from a can of chipotle peppers to the BBQ sauce. Smoky, moderately hot, complex. The chipotle enhances the smoked paprika in the dry rub for a layered smoke effect.
🍋 Lemon Pepper BBQ
Add 1 tsp lemon zest and 1 tsp cracked black pepper to the BBQ sauce. The citrus cuts through the sweetness and adds brightness. Finish with a squeeze of fresh lemon after the final sauce coat.
🧄 Garlic Parmesan BBQ
Replace the BBQ sauce with a garlic butter + grated parmesan finish for the last 5 minutes. Apply the same two-coat method with garlic butter only (no parmesan) for Stage 2A, then add the parmesan for Stage 2B and watch it toast on the skin.
🥭 Mango Habanero
Mix 3 tbsp mango jam with 3 tbsp your regular BBQ sauce and a small pinch of habanero powder. The fruit sugar caramelizes beautifully. Sweet up front, heat in the finish — the most shareable variation on Pinterest.
🫚 Korean Gochujang
Replace BBQ sauce with a blend of 2 tbsp gochujang, 1 tbsp honey, 1 tbsp soy sauce, and 1 tsp sesame oil. Apply same two-coat method. Finish with sesame seeds and sliced scallions. Completely different flavor world, identical technique.
Storage, Freezing and Reheating
Fridge: Store in an airtight container for up to 4 days. The glaze softens in the fridge — this is not a problem, it just means the reheating step is also a re-crisping step.
Reheating perfectly: Preheat air fryer to 370°F, reheat drumsticks for 4-5 minutes. The lower temperature warms through without pushing past the original doneness, and the dry air re-crisps the skin that softened in the fridge. Apply a very thin brush of fresh BBQ sauce in the last minute to refresh the glaze. This is the correct method. Microwave reheating ruins the texture irreversibly — soft, unevenly heated, glaze becomes rubbery.
Freezing: Freeze cooked drumsticks individually on a parchment-lined sheet, then transfer to a freezer bag. Up to 3 months. Thaw overnight in the fridge before reheating in the air fryer. Frozen and properly reheated air fryer drumsticks are genuinely good — far better than most frozen BBQ chicken products and ready in under 10 minutes from thawed.
Meal Prep Tips
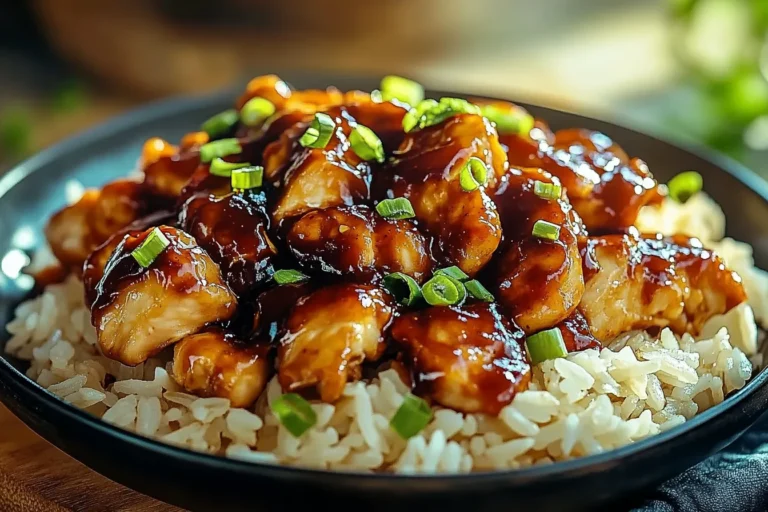
Season up to 24 hours ahead and dry brine uncovered in the fridge — this improves both flavor and skin texture. Cook in batches of 8 and refrigerate. For weekly meal prep, pair with rice, coleslaw, and corn — the full BBQ plate in containers, ready to reheat in 5 minutes throughout the week.
For a party prep strategy: cook the drumsticks through Stage 1 (15 minutes at 380°F) up to 2 hours ahead. Hold at room temperature. When guests arrive, run the two-coat BBQ sauce stage (10 minutes at 400°F) fresh — your guests get hot, freshly glazed drumsticks and you spent zero time in the kitchen during the party. This is how caterers handle BBQ chicken for large groups.
Nutrition Information (Per Serving — 2 drumsticks)
2 drumsticks with BBQ sauce per serving. Values approximate — varies with BBQ sauce brand.
Why This Recipe Is Built for Pinterest Virality
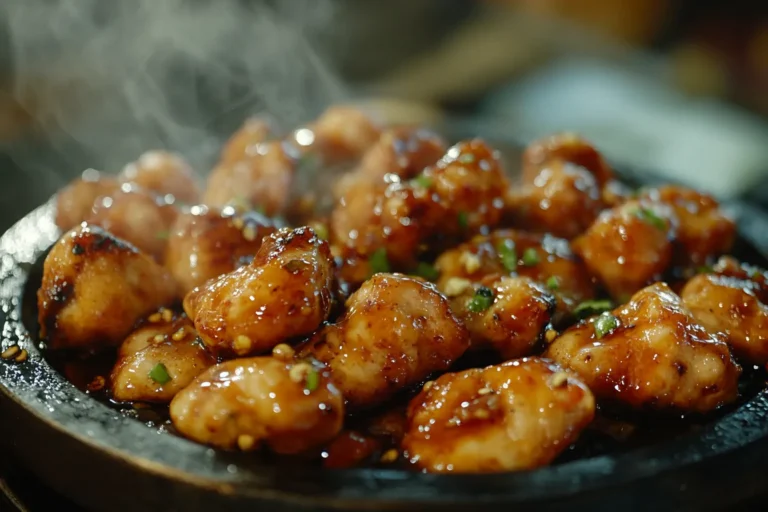
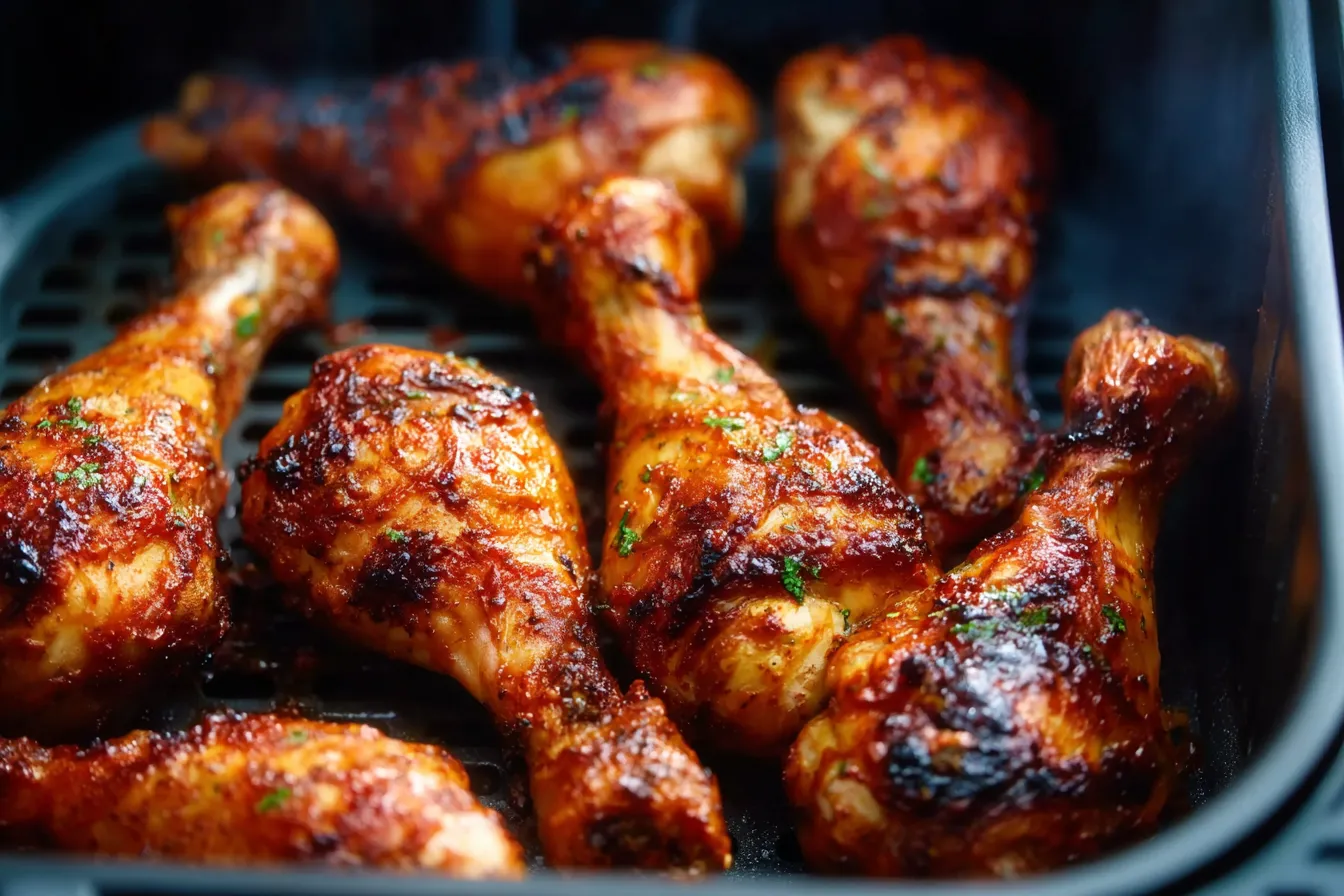
BBQ chicken is one of the top-performing food categories on Pinterest year-round — searches spike every spring and summer but maintain strong baseline traffic through the colder months as comfort food. The visual elements of this recipe are specifically engineered for Pinterest performance: the deep amber glaze contrast against the dark skin, the steam-off-hot-food moment, and the close-up texture shot of the two-coat finish are exactly the visual triggers that drive saves.
The “25 minutes” and “air fryer” combination in the title hits two of Pinterest’s highest-performing food content categories simultaneously. For maximum pin performance, use a vertical 2:3 image ratio (1000×1500px), include the prep time in the title overlay, and create a second pin variation with a “meal prep” angle for the containers photography.
🍗 Air Fryer BBQ Chicken Drumsticks
Ingredients
- 8 chicken drumsticks (~3 lbs)
- 1 tbsp olive oil
- 1 tsp garlic powder
- 1 tsp smoked paprika
- 1 tsp onion powder
- ½ tsp black pepper
- ½ tsp kosher salt
- ¼ tsp cayenne (optional)
- ¾ cup BBQ sauce, divided
- Optional: 1 tbsp butter (finish)
Instructions
- Pat drumsticks completely dry. Season with oil + all dry spices. Rest 5 min.
- Preheat air fryer to 380°F for 3 minutes.
- Arrange in single layer with space between each piece.
- Cook 15 min at 380°F, flip once at 8 minutes.
- Raise to 400°F. Brush with half the BBQ sauce. Cook 5 minutes.
- Brush remaining BBQ sauce. Cook 3-5 min until deeply caramelized.
- Verify 165°F internal temp. Rest 3 min before serving.
Frequently Asked Questions
Pat dry. Two-stage temperature. BBQ sauce in two coats, last 10 minutes only. Rest before serving.
Four decisions. 25 minutes. Sticky, caramelized glaze and crispy skin that you used to only get from a grill at a summer cookout.
Made these? Drop a ⭐⭐⭐⭐⭐ rating below — it takes 10 seconds and helps this recipe reach more people who are still fighting with pale, soggy BBQ chicken.