Cast Iron Skillet Pizza – The Crispy-Bottom Science That Makes It Better Than Any Delivery You’ve Ever Ordered

Friday night. You’re twenty minutes away from calling your usual pizza place. You’ve done the math: $28 plus tip, 45-minute wait, arrives lukewarm in a cardboard box that somehow absorbs half the bottom crispiness during transit. The pizza is fine. It is always fine. You eat it standing at the counter and feel exactly as satisfied as a person feels when something is fine.
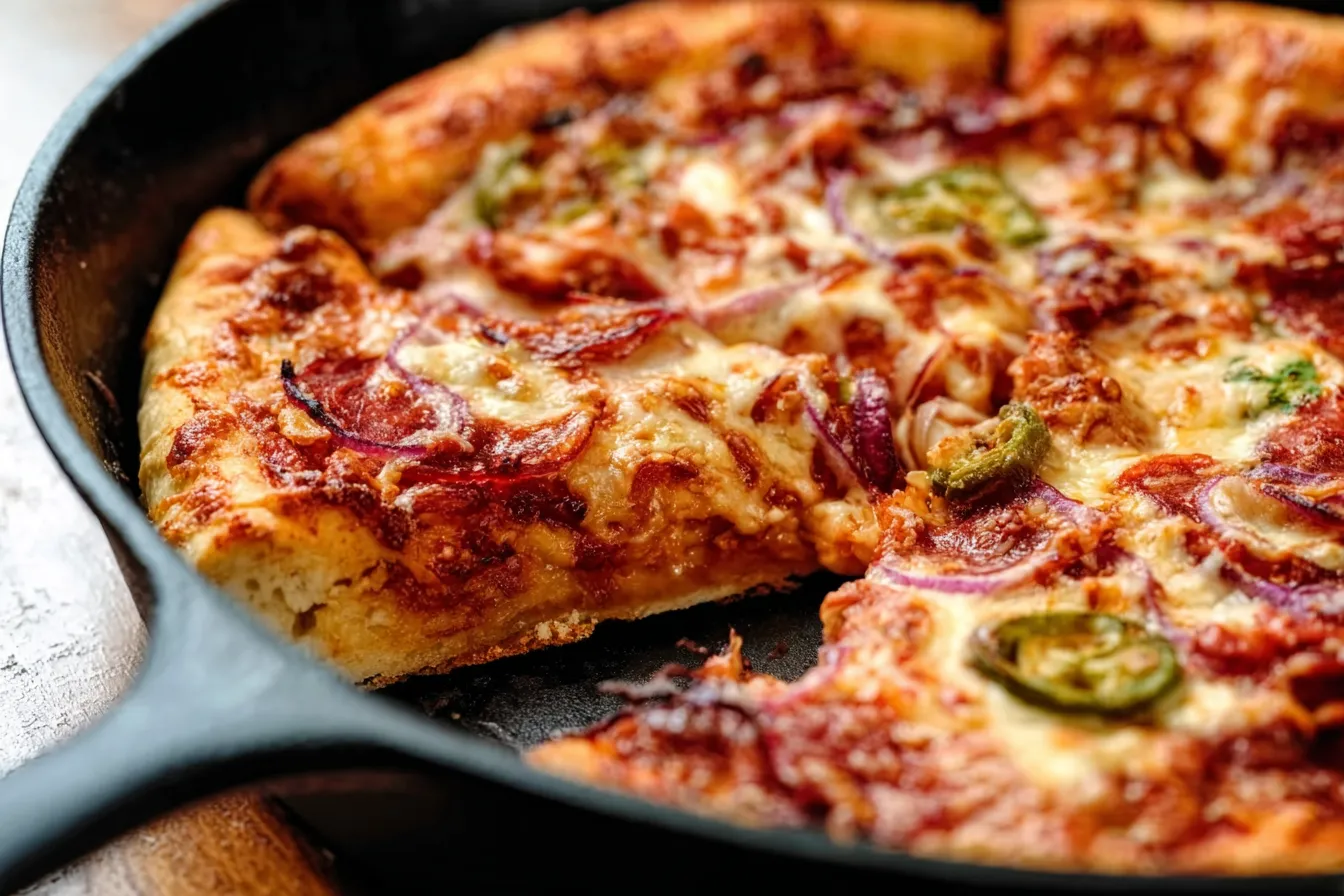
Now imagine this instead: you pull a 12-inch cast iron skillet out of a 500°F oven. The bottom of the pizza is making a sound — a quiet, steady sizzle that tells you before you even look at it that something has happened to the underside of that crust. You slide it out onto a board. The bottom is this dark, uneven gold that catches the kitchen light. You lift a corner with a spatula and it flexes once before snapping back with a crispiness that no delivery box has ever, in the history of delivery boxes, preserved through a car ride.
The cheese at the edges has caramelized directly against the hot cast iron — not just melted, but genuinely browned in the corners where it touched the metal. That’s the thing you can’t fake and can’t order. That’s physics, and it only works in a preheated cast iron skillet at 500°F in your oven.
This guide gives you the full technique — why the preheat is non-negotiable, what the oil does in two separate ways, the cheese-to-edge rule that produces the caramelized crust, and the three chef moves that separate a good skillet pizza from the one that makes guests immediately ask for the recipe.
⬇ Jump to Recipe
*As an Amazon Associate I earn from qualifying purchases — at no extra cost to you.
- Shatteringly crispy bottom — physics, not luck
- Caramelized cheese crust at the edges every time
- Works with homemade or store-bought dough
- 500°F + preheated cast iron = wood-fired oven result
- 30 minutes from fridge dough to table
- Toppings pressed to the very edge — no bare rim
- No pizza stone, no pizza oven, no special equipment
- Better reheated than delivery — actually improves in the skillet
🔬 The Crust Science Lab — Why Your Oven Temperature and Pan Material Are the Recipe
Most home pizza recipes treat temperature as a detail. It isn’t. It’s the mechanism. Here’s what’s happening inside your oven during a cast iron skillet pizza bake — understanding this is what separates someone who makes good skillet pizza from someone who makes it great consistently.
When pizza dough hits a hot surface, two things compete: the starches in the dough want to crisp from the surface heat, and the moisture inside the dough wants to escape as steam. Which process wins determines the texture of your crust. If the pan is not hot enough, steam wins — you get a pale, bready bottom that never crisped. If the pan is adequately hot and retains heat through the temperature drop of cold dough, the surface starch crisps faster than steam can saturate it. That is the definition of a properly baked pizza crust.
The cast iron advantage is thermal mass. A preheated 12-inch Lodge skillet contains approximately 4.5 lbs of iron that has been absorbing oven heat for 15 minutes at 500°F. When 12oz of room-temperature dough contacts that surface, the iron temperature drops a few degrees — but unlike a thin sheet pan or stainless pan that would drop significantly, the cast iron rebounds almost immediately. The dough bottom begins crisping from the first second of contact and never stops.
This is why a pizza stone or baking steel works in professional settings — same principle, different material. At home, the 12-inch cast iron skillet is the most accessible tool that provides this thermal mass effect. According to the food scientists at Serious Eats Food Lab, the difference in bottom crust quality between a preheated cast iron and a cold pan is more significant than the difference between homemade and store-bought dough. The pan is the recipe.
Cast Iron Pizza vs. Other Pizza Styles — Where It Fits
Cast iron skillet pizza is a pan pizza style cooked in a preheated cast iron skillet at high temperature (500°F/260°C). It shares characteristics with Detroit-style pizza (caramelized cheese edges, thick crust) and New York pan pizza (crispy bottom, tomato sauce forward) but is distinct from both. The defining characteristics are the circular shape from the round skillet, the oil-seared bottom crust from preheating, and the caramelized cheese where it contacts the pan edges — all achievable in a standard home oven without specialized equipment.
Ingredient Guide — What Each Component Is Actually Doing
The dough — room temperature is not optional
Cold dough is tighter because cold slows gluten relaxation. Cold dough placed in a hot pan also drops the pan temperature more than room-temperature dough. Both effects work against you. If using refrigerated store-bought dough, remove it from the fridge at least 30 minutes before stretching — ideally 60 minutes. The dough should stretch easily without springing back. If it springs back aggressively, it’s still too cold. Cover it and wait 10 more minutes.
| Dough Type | Prep Time | Texture Result | Verdict |
|---|---|---|---|
| Homemade 24-hour cold ferment | 24h + 30min warm | Crispy, complex, bubbly crumb | ✅ Best flavor + texture |
| Homemade same-day | 2h rise + 30min warm | Good texture, less complex | ✅ Solid weeknight option |
| Store-bought fresh | 30-60min room temp | Slightly denser, very good | ✅ Best convenience option |
| Trader Joe’s refrigerated | 45min room temp | Thin, crispy — excellent | ✅ Top store-bought choice |
| Frozen dough ball | Overnight thaw + 30min | Variable — depends on brand | ⚠️ Test brand first |
The oil — two separate jobs at two different stages
Oil serves two completely different functions in this recipe and the amount at each stage matters. The first oil application (into the hot skillet before the dough) creates the fry-sear that produces the crispy bottom — 2 tablespoons is the right amount. Too little and the bottom doesn’t fry properly. Too much and the pizza tastes greasy and the oil smokes aggressively. The second oil application (a drizzle over the assembled pizza before baking) creates surface crisping on the toppings and helps the dough edge brown. Use olive oil for flavor — its smoke point is adequate at 500°F for this short bake time.
The cheese — low-moisture mozzarella and the edge-to-edge rule
Low-moisture mozzarella (the kind sold in blocks or pre-shredded bags, not fresh buffalo mozzarella in water) is the correct cheese for this recipe. Fresh mozzarella releases too much water during baking, which steams the pizza from above and prevents proper browning. Low-moisture melts into the cohesive, pull-able sheets that produce the signature skillet pizza look. And the rule: cheese goes all the way to the edge of the pan — touching the sides. This is what creates the caramelized cheese crust that no delivery pizza ever has.
Kitchen Tools — What Makes a Measurable Difference
A 12-inch cast iron skillet: The foundation of everything. Lodge is the standard recommendation for home cooks — widely available, pre-seasoned, correctly sized for a 12oz dough ball. The 10-inch skillet produces a thicker pizza; the 12-inch produces the right dough thickness for a crispy-to-chewy ratio.
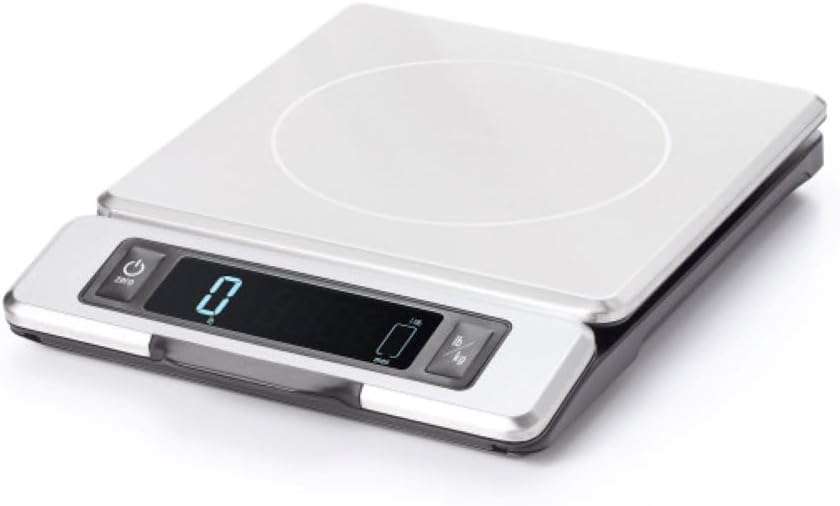
Oven thermometer: Most home ovens run 25-50°F below their displayed setting. At 500°F displayed, your oven may be producing 460°F actual heat — which puts you in the “acceptable but not optimal” zone for crust crispiness. A $12 oven thermometer eliminates this variable permanently and is the most impactful investment for any high-temperature baking.
Oven mitt rated for 500°F+: Standard oven mitts are rated to 350-400°F. A cast iron skillet at 500°F will transfer heat through inadequate mitts in seconds. Use silicone oven mitts or thick welding gloves — the ones rated to 662°F that every serious cook eventually owns.

*As an Amazon Associate I earn from qualifying purchases — at no extra cost to you.
Step-by-Step Method — The Full Technique With Every Reason
- Preheat — oven to 500°F with cast iron inside from the start. Move one oven rack to the very lowest position. Place the empty cast iron skillet on this rack. Turn the oven to 500°F and let both the oven and the skillet preheat together for at least 15 minutes after the oven reaches temperature. This is the step most recipes abbreviate and shouldn’t — 15 minutes ensures the iron is at full thermal capacity, not just warm. A cold or partially-heated skillet produces a significantly inferior crust. Use the 15 minutes to prep your dough, sauce, and toppings.
- Remove the hot skillet carefully — this is extremely hot. Use heavy-duty oven mitts rated for high temperatures. The skillet is at or near 500°F — this is the same temperature as commercial pizza ovens. Set it on a trivet or heat-safe surface. Work quickly but carefully for the next 3 minutes — the skillet begins losing heat immediately once removed from the oven.
- Oil the pan immediately — two tablespoons, swirled to the edges. Add 2 tablespoons of olive oil to the hot skillet and swirl to coat the bottom and at least an inch up the sides. The oil should shimmer immediately — if it doesn’t, the pan isn’t hot enough. The oil creates both the non-stick surface for dough release and the frying medium that produces the crispy bottom. Too much oil makes the pizza greasy; too little makes the bottom stick and not fry properly.
- Stretch the dough to the edges — no thick rim. Place the room-temperature dough ball in the center of the oiled skillet. Using your fingers, gently press and stretch from the center outward until the dough fills the bottom. If the dough springs back, let it rest 2 minutes and try again — the gluten needs time to relax. The dough should be even in thickness (about ¼ inch) and should not go up the sides. No need to toss or spin — press method works perfectly for cast iron.
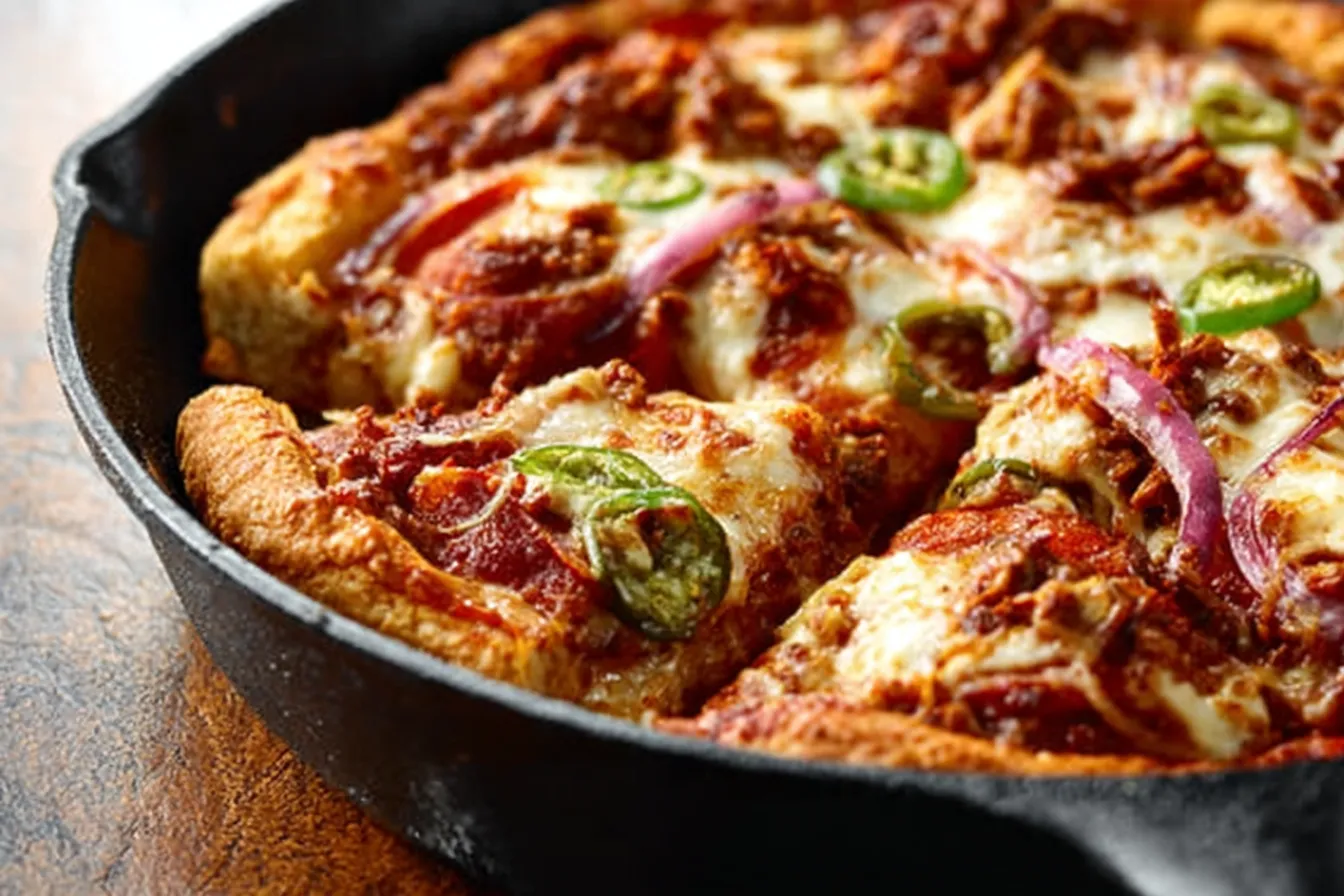
- Sauce to within half an inch — but cheese all the way to the edge. Spread pizza sauce evenly leaving about ½ inch of bare dough around the perimeter. Then add the cheese — and this is the critical move — spread it completely to the edge of the pan, touching the sides. When the cheese contacts the 500°F iron at the edges, it caramelizes and crisps against the metal, creating the signature dark-edged crust. This is the detail that makes skillet pizza look and taste different from anything else. Don’t skip it.
- Add toppings sparingly — too much weighs down the crust. Add your toppings over the cheese layer. The rule: toppings should be evenly distributed but not piled. Overloaded toppings create steam during baking that softens the crust from above while it’s trying to crisp below. Pepperoni is ideal — it renders its fat into the cheese below and crisps at the edges. A drizzle of olive oil over the top, a pinch of dried oregano, and optionally red pepper flakes.
- Bake on the lowest rack — 18-22 minutes at 500°F. Return the assembled pizza (in the cast iron) to the lowest rack of the 500°F oven. The bottom rack position maximizes the heat reaching the pan bottom — where you need it most. Bake 18-22 minutes. At 18 minutes, check the edges: the cheese should be deeply golden and starting to char at the contact points. The underside should be dark golden when you lift an edge with a spatula. If pale, continue 3-4 more minutes.
- Rest 3 minutes in the pan — then slide, don’t lift. Remove from the oven. Let the pizza rest in the skillet for 3 minutes — this allows the crust to firm up enough to slide out cleanly and lets the cheese set slightly so it doesn’t slide off the first slice. Then run a spatula around the edges, tilt the pan, and slide the pizza directly onto a cutting board. Cut immediately with a rocker or sharp pizza cutter. The bottom will be audibly crispy.
Chef Insider Secrets — Three Moves That Separate Good From Unforgettable
After oiling the preheated skillet and before adding the dough, sprinkle 1 tablespoon of coarse cornmeal evenly across the bottom of the pan. The cornmeal does two things simultaneously: it creates micro-pockets of air beneath the dough that produce an even crispier, more textured bottom crust, and it prevents the dough from sticking even if the oil isn’t perfectly distributed. This is the technique used in Detroit-style pizza shops to produce that signature crunchy, cratered underside. It adds zero visible texture to the eating experience — you only notice it as a more extreme crunch on the bottom of each slice.
Before adding the tomato sauce, brush the stretched dough with a thin layer of garlic-infused olive oil (2 tablespoons olive oil + 2 minced garlic cloves, warmed together for 60 seconds). Let this absorb for 2 minutes, then add the sauce on top. The garlic oil creates a moisture barrier between the wet sauce and the dough, reducing the steam that can make the center of the crust slightly soggy. It also adds a background garlic depth that makes the entire pizza taste more complex. Professional pizza makers call this the “oil barrier” — it’s standard in every good pizzeria and absent in every home recipe.
At the last 3 minutes of baking, pull the pizza from the oven, add a handful of freshly torn fresh mozzarella on top of the already-melted low-moisture mozzarella, and return to the oven. The cold fresh mozzarella heats just enough to melt at the surface while the low-moisture underneath is fully caramelized. You get two cheese textures simultaneously: the browned, caramelized layer below and the milky, fresh layer above. This is the cheese finish technique used in Neapolitan-influenced pizza shops and it produces a final pizza that looks layered and intentional rather than uniformly flat.

*As an Amazon Associate I earn from qualifying purchases — at no extra cost to you.
Common Mistakes — The Complete Failure Map
| Mistake | What Goes Wrong | The Fix |
|---|---|---|
| Not preheating the skillet | Dough steams from below instead of crisping — pale, soft bottom | Skillet in oven during full preheat — minimum 15 min at 500°F after oven reaches temp |
| Cold dough | Dough springs back, won’t fill the pan, drops pan temp more | Room temperature 30-60 min before stretching — non-negotiable |
| Cheese not to the edge | No caramelized cheese crust — the signature feature is missing | Push cheese to the very edge, touching the pan sides |
| Too many toppings | Steam trap — softens crust from above during bake | Toppings evenly distributed, not piled. Less is more here. |
| Too much oil in the pan | Greasy, heavy bottom — pool of oil under the crust | 2 tablespoons exactly. Swirl to coat, don’t fill. |
| Wrong rack position | Cheese burns before crust crisps — oven heat from top cooks faster | Lowest rack always — maximum heat to the pan bottom |
| Lifting pizza instead of sliding | Tears the caramelized bottom — years of work undone in 2 seconds | Slide out with spatula assist — never lift the whole pizza directly |
| Cutting immediately without resting | Cheese slides off the first slice before it has set | 3 minutes rest in the hot pan before sliding out and cutting |
8 Cast Iron Pizza Variations — One Pan, Eight Different Fridays
🧄 White Garlic & Ricotta
Skip the tomato sauce. Spread ricotta mixed with 2 minced garlic cloves and olive oil as the base. Top with low-moisture mozzarella, fresh spinach, and a drizzle of truffle oil after baking. The white pizza that converts people who think they only like red.
🍕 The Detroitish
Apply sauce on top of the cheese rather than under it — this is the Detroit method. The cheese caramelizes without the sauce moisture and the sauce concentrates during baking into a more intense, jammy layer. Add thick-cut pepperoni.
🧅 Caramelized Onion & Gorgonzola
White base with caramelized onions (cook 30 min beforehand), crumbled gorgonzola, and walnuts. Finish with fresh arugula and balsamic drizzle after baking. The dinner party skillet pizza that makes guests forget it came from a home kitchen.
🌶️ Hot Honey & Pepperoni
Standard pepperoni pizza but drizzle with hot honey (Mike’s Hot Honey is the reference brand) immediately after it comes out of the oven, while the cheese is still molten. The sweet-heat contrast with the caramelized pepperoni cups is specifically addictive.
🍗 Chicken Pesto
Replace tomato sauce with basil pesto. Add shredded rotisserie chicken, sun-dried tomatoes, and fresh mozzarella. Finish with fresh basil torn over the top after baking. The summer Friday pizza that doesn’t feel heavy.
🥓 Breakfast Cast Iron Pizza
No tomato sauce. Olive oil base with shredded mozzarella, crumbled cooked bacon or sausage, and 3 cracked eggs placed on top after 10 minutes of baking. Return to oven for 8-10 more minutes until eggs are set. Friday night breakfast pizza is legitimately excellent.
Storage, Reheating and Why Skillet Pizza Is Better the Next Day
Storage: Leftover slices in an airtight container in the fridge for up to 4 days. Unlike delivery pizza that arrives already compromised, cast iron skillet pizza stores at the same quality level it was baked — the crust is already as dry and crispy as it will get, so it doesn’t degrade further overnight.
The superior reheating method: Return the slices to a dry cast iron skillet over medium heat. Cover loosely with a lid or foil for 3 minutes — the trapped heat melts the cheese — then remove the cover for 1 minute to re-crisp the bottom. The reheated cast iron skillet pizza is indistinguishable from fresh, and in some ways better because the flavors have had 12 hours to develop. This is genuinely the best reheating method for any pizza and the reason people who make cast iron pizza stop ordering delivery for lunch the next day.
Freezing: Freeze individual slices on a parchment-lined sheet, then transfer to a freezer bag. Up to 2 months. Reheat from frozen in the cast iron method above — add 4-5 minutes covered before uncovering to crisp. Or in a 425°F oven directly on the rack for 8-10 minutes from frozen.
Meal Prep — Making Pizza Nights Faster Without Losing Quality
Make the pizza dough up to 3 days ahead and store in the fridge after the first rise — cold fermentation actually improves flavor. Bring to room temperature 45-60 minutes before use. Make the pizza sauce up to 1 week ahead (or use a quality jarred sauce — no shame, Rao’s Homemade is the reliable reference brand). With dough and sauce prepped, the entire Friday pizza build takes 5 minutes of active work before it goes into the oven.
Nutrition Information (Per Serving — ¼ of pizza)
Based on classic pepperoni version with store-bought dough. Values approximate — varies significantly with toppings.
*As an Amazon Associate I earn from qualifying purchases — at no extra cost to you.
🍕 Cast Iron Skillet Pizza
Ingredients
- 🍕 Pizza
- 12 oz pizza dough, room temp
- 3 tbsp olive oil, divided
- ½ cup pizza sauce
- 1½ cups low-moisture mozzarella
- ½ cup pepperoni slices
- 2 tbsp Parmesan, grated
- ½ tsp dried oregano
- ¼ tsp red pepper flakes
- 🌿 Finish
- Fresh basil leaves
- Optional: hot honey drizzle
- Optional: 1 tbsp cornmeal (bottom)
Instructions
- Preheat oven to 500°F with cast iron skillet on lowest rack — 15+ min after oven reaches temp.
- Remove hot skillet with heavy mitts. Add 2 tbsp olive oil, swirl to coat bottom and sides. Optional: dust with 1 tbsp cornmeal.
- Add room-temperature dough. Press and stretch to fill pan evenly (about ¼” thick). If springs back, rest 2 min and try again.
- Spread sauce leaving ½” bare at edge. Add mozzarella ALL THE WAY to the edge — touching the pan sides. Add toppings evenly (not piled). Drizzle with remaining 1 tbsp olive oil and sprinkle oregano.
- Return to lowest rack. Bake 18-22 min until crust is deep golden and cheese is caramelized at edges.
- Rest 3 min in pan. Slide out with spatula onto cutting board. Add fresh basil, optional hot honey. Cut and serve immediately.
Frequently Asked Questions
Preheat the cast iron. Oil it hot. Stretch the dough. Cheese all the way to the edge. Lowest rack, 500°F, 20 minutes.
The bottom will crunch. The edges will caramelize. Your kitchen will smell like the best pizzeria you’ve ever been to.
Made this? Leave a ⭐⭐⭐⭐⭐ rating below — and tell me which variation you tried first. Hot honey is the right answer but I won’t judge.