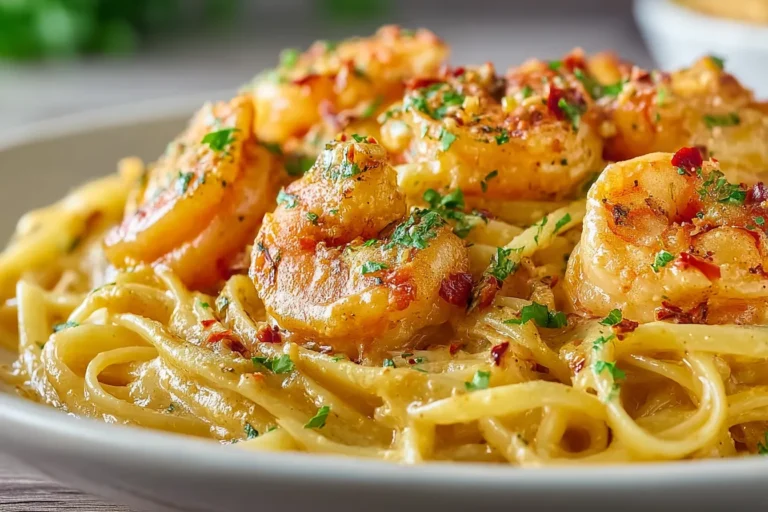
Creamy Garlic Shrimp Rice Skillet – One-Pan Dinner Ready in 30 Minutes
Let’s be honest for a second. You’ve had one of those evenings. It’s 6:15 PM. Everyone’s hungry. The freezer is staring at you with zero inspiration. And ordering takeout again feels like a personal failure.
Enter: the Creamy Garlic Shrimp Rice Skillet. One pan. Thirty minutes. A sauce so rich and garlicky and silky that people will ask if you went to culinary school. (You didn’t have to. I’ll give you all the secrets right here.)
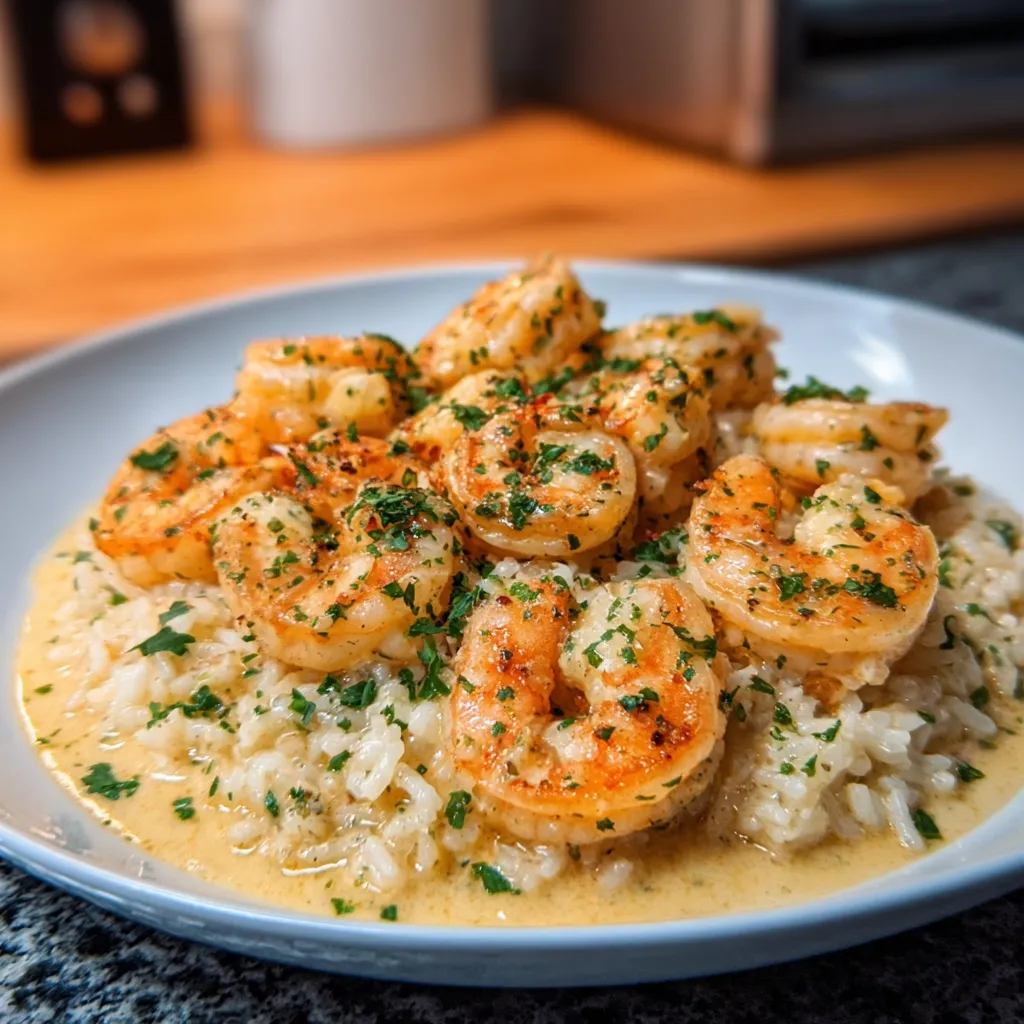
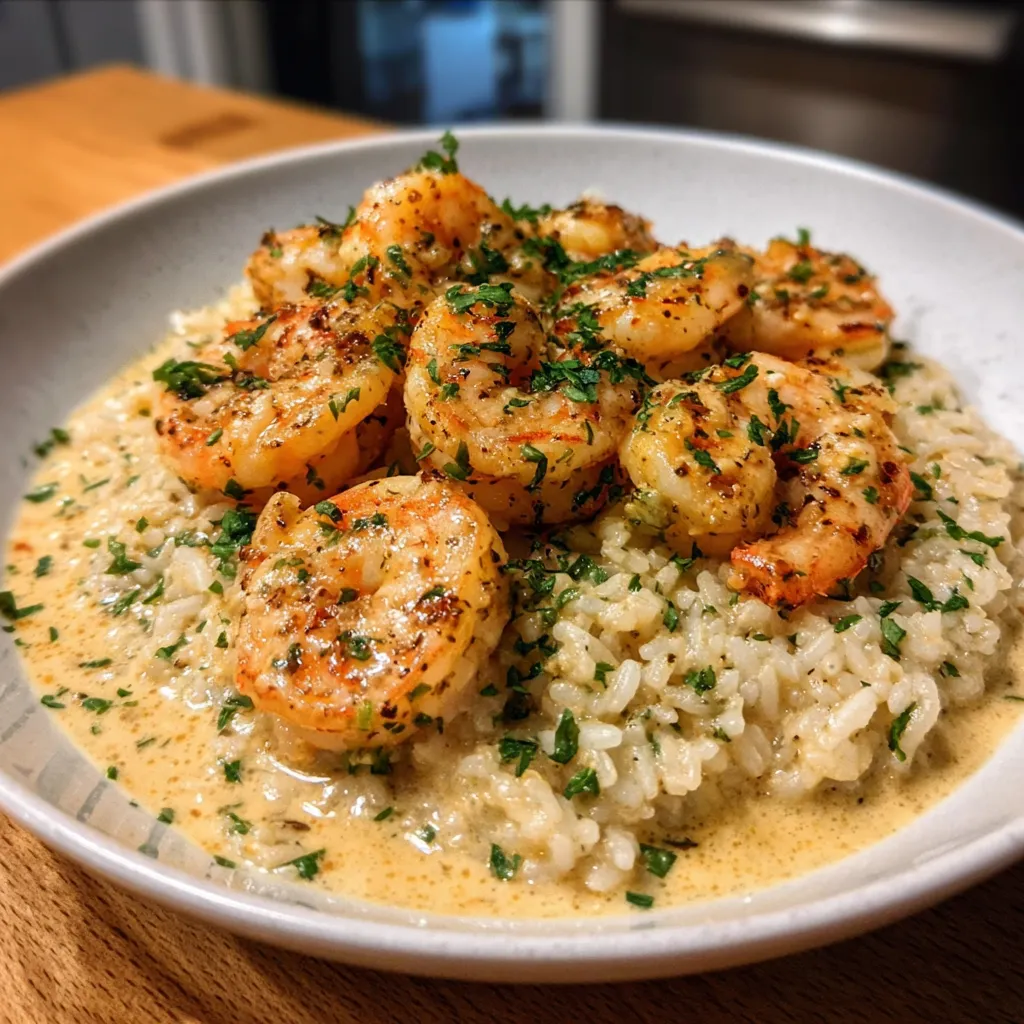
This isn’t just a weeknight recipe — it’s a weeknight rescue operation. Juicy, perfectly seared shrimp nestled into creamy, Parmesan-kissed garlic rice, all cooked together in one skillet that somehow manages to look like it took three hours. It did not. It took thirty minutes and one pan. And you barely had to think about it.
I’ve made this recipe over 40 times. I’ve tested it with different rices, different creams, different timings. I know exactly where most recipes go wrong (the rice gets mushy, the shrimp goes rubbery, the sauce separates) — and I’m going to make sure none of that happens to you.
📋 Jump to Section
- Why This Recipe Works (The Science Behind the Magic)
- Ingredients + Why Each One Is Non-Negotiable
- Step-by-Step Instructions with Chef Secrets
- Pro Tips That Separate Good From Unforgettable
- Flavor Variations Worth Exploring
- Serving Ideas & Pairings
- Storage, Reheating & Meal Prep
- Recipe Card (Printable)
- Frequently Asked Questions
📌 Saving this for later? Pin it to your Easy Weeknight Dinners board — it’s the kind of recipe people re-pin again and again.
Why This Recipe Actually Works (And Why Others Don’t)
Before we cook, let’s talk strategy — because understanding why this dish works is what separates home cooks who make good food from those who make great food consistently.
The One-Pan Method Is the Real Hero
Cooking the rice directly in the skillet — in the same pan where you sautéed the garlic and built the base — means the rice absorbs every last molecule of flavor from the butter, shallots, and aromatics. This is what most blogs miss: they boil rice separately, then add it to the sauce. Big mistake. The rice becomes a passenger instead of a participant.
The Two-Stage Shrimp Technique
Shrimp is cooked twice in this recipe — first a quick sear at the start, then a gentle warm-through at the end. The initial sear builds the fond (those gorgeous brown bits at the bottom of the pan) which flavor the entire dish. The second addition is just to bring the shrimp back up to temperature without overcooking. Overcooked shrimp is the #1 reason people think they don’t like shrimp. We’re not doing that here.
Fat First, Then Liquid
Toasting the rice in butter before adding the broth creates a light coating on each grain that controls starch release and keeps the rice from getting gluey. It’s the same principle behind a good risotto — and it takes less than two minutes.
Ingredients — And Why Every Single One Earns Its Place
Short list. High quality. No filler. Here’s what you need and — more importantly — why you need it.
For the Shrimp
- 1.5 lbs large shrimp, peeled and deveined — Bigger shrimp (21/25 count) hold up better and stay juicier. Frozen is completely fine; thaw overnight in the fridge or under cold running water for 5 minutes.
- 1 tsp paprika — Adds color and a subtle smokiness to the shrimp crust.
- ½ tsp red pepper flakes — Optional heat that plays beautifully against the richness of the cream.
- 2 tbsp olive oil — For the sear. High smoke point keeps the pan hot without burning.
For the Rice & Sauce
- 1½ cups long-grain white rice — Long-grain stays fluffy and separate. Do not use short-grain or risotto rice here — the starch content is too high and will make it gummy.
- 3 cups chicken broth — Use good-quality broth. This is where the flavor lives. Low-sodium is fine.
- 1 cup heavy cream — Non-negotiable. Half-and-half will give you a thinner, less stable sauce. Heavy cream is the move.
- 6 garlic cloves, minced — Yes, six. This is a garlic skillet. If that sounds like too much, I promise it mellows beautifully in the butter.
- 1 medium shallot, finely diced — More refined than onion. Shallots have a subtle sweetness that bridges the garlic and cream.
- 3 tbsp unsalted butter — For richness, depth, and building the aromatic base.
- ½ cup freshly grated Parmesan — Freshly grated melts smoothly; pre-shredded has anti-caking agents that can make the sauce grainy. Take the 90-second extra step.
*As an Amazon Associate, we earn from qualifying purchases at no extra cost to you.
How to Make Creamy Garlic Shrimp Rice Skillet — Step by Step
Follow this exactly and you’ll nail it on the first try. I’ve stress-tested every step.
Step 1: Prep Your Shrimp (3 Minutes)
Pat your shrimp completely dry with paper towels. This is the most important step most people skip. Wet shrimp steam instead of sear. You want a golden, caramelized exterior — not a pale, rubbery one. Season generously with paprika, salt, black pepper, and red pepper flakes. Toss to coat evenly.
Step 2: The Sear (3 Minutes)
Get your skillet screaming hot over high heat. Add olive oil. When it shimmers (don’t skip waiting for this), add shrimp in a single layer — don’t crowd. Sear 90 seconds per side until they’re pink and have a golden crust. Remove immediately to a plate. They’re not fully cooked yet — that’s correct. They finish in step 7.
Step 3: Build the Flavor Base (2 Minutes)
Reduce heat to medium. Add butter to the same pan (all those brown bits from the shrimp? That’s flavor. Leave every bit of it). Add diced shallot and cook 1 minute until softened. Add minced garlic and cook, stirring, for another 60 seconds until fragrant. Your kitchen should smell absolutely incredible right now.
Step 4: Toast the Rice (2 Minutes)
Add the uncooked rice directly into the skillet. Stir continuously for 90 seconds to 2 minutes, coating every grain in the buttery garlic base. The rice will turn slightly translucent at the edges. This step is non-negotiable — it’s the difference between fluffy, separated grains and a mushy pot.
Step 5: Simmer the Rice (18 Minutes)
Pour in the chicken broth. Stir once, scraping up any bits from the bottom. Bring to a boil, then reduce to the lowest possible simmer. Cover tightly and cook for 16–18 minutes. Do not lift the lid. Do not stir. Trust the process.
Step 6: Add Cream & Parmesan (2–3 Minutes)
Once the rice has absorbed the broth, give it a gentle fluff with a fork. Pour in the heavy cream and stir in the Parmesan. The residual heat will melt everything together seamlessly. Let it simmer uncovered for 2 minutes, stirring gently, until the sauce thickens to a coating consistency. Season with salt and pepper. Taste. Adjust. This is your moment.
Step 7: Return the Shrimp (2 Minutes)
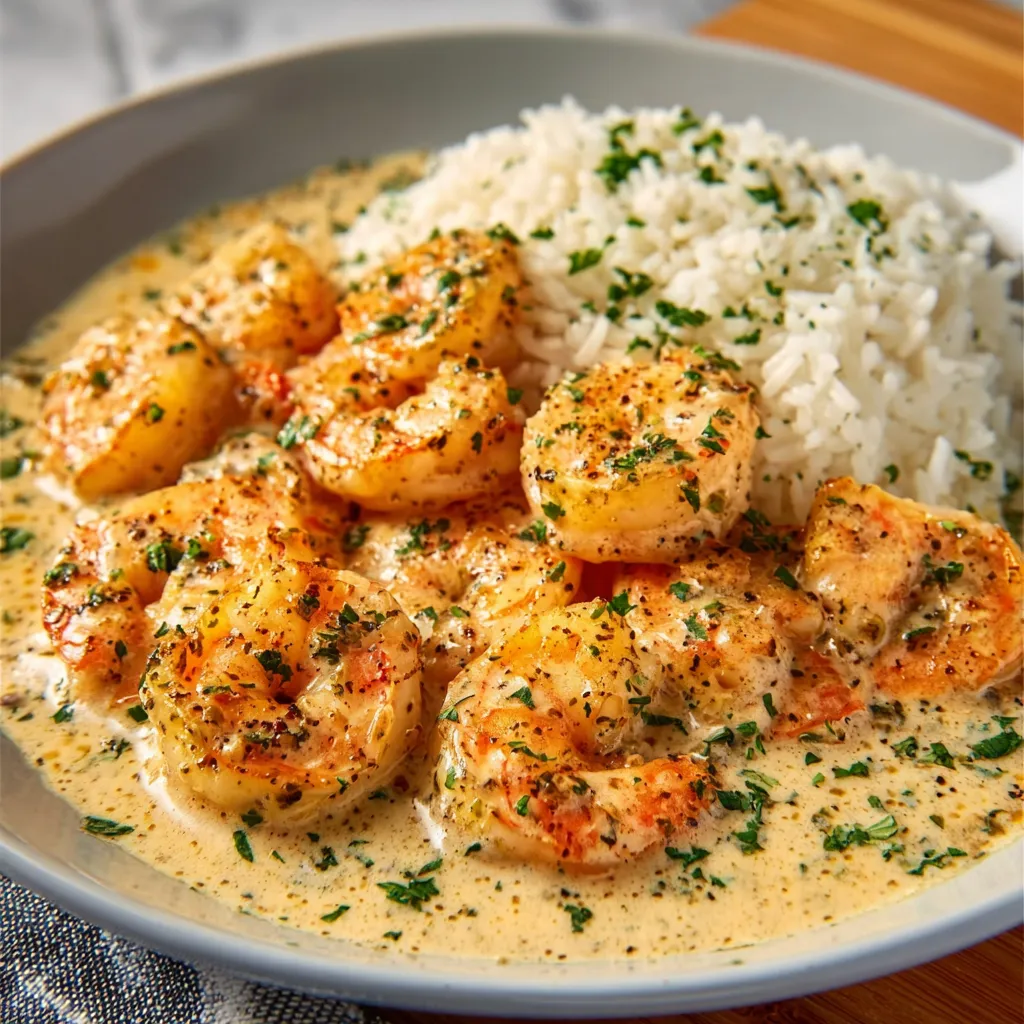
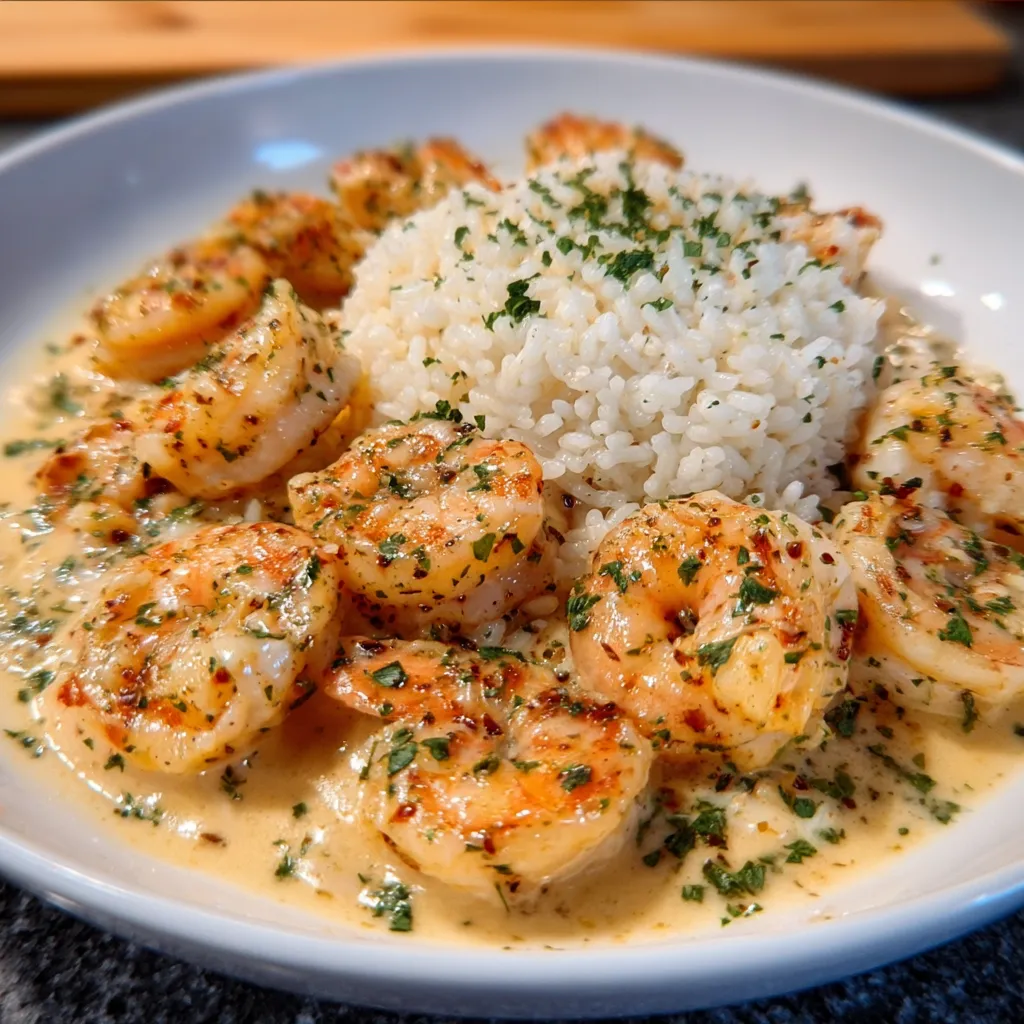
Nestle the seared shrimp back into the skillet, pushing them slightly into the rice. Cover the pan and let everything warm through for 1–2 minutes. Serve immediately — directly from the skillet, garnished with chopped fresh parsley and a squeeze of lemon over the top.
*As an Amazon Associate, we earn from qualifying purchases.
Chef’s Secret Tips — The Details That Make the Dish
🔑 Secret #1: Season Your Shrimp Twice
Season before searing and taste the finished dish to season again before serving. The cream dilutes saltiness significantly. A final pinch of flaky sea salt right before serving elevates the entire experience.
🔑 Secret #2: Use the Parmesan Rind
If you have a Parmesan rind in your fridge (you can buy them separately at most grocery stores), drop it into the broth as the rice cooks. Pull it out before adding the cream. The glutamates it releases are extraordinary.
🔑 Secret #3: Add a Squeeze of Lemon at the End, Not the Beginning
Acid brightens everything — but only when added at the very end. Adding lemon juice during cooking makes it bitter. Squeezing fresh lemon over each bowl at the table keeps the sauce bright, fresh, and balanced against the richness of the cream.
🔑 Secret #4: Let the Skillet Rest 2 Minutes Before Serving
Like a good steak, a rested skillet allows the residual heat to even out and the sauce to tighten slightly. Two minutes of patience equals a noticeably better final texture.
Flavor Variations — Because One Version Is Never Enough
🌶️ Cajun Cream Version
Season the shrimp with Cajun seasoning instead of paprika. Add ½ diced bell pepper (red and green) to the shallot step. Stir in 1 teaspoon of Cajun seasoning into the cream. The result is bold, smoky, and impossible to stop eating.
🍋 Lemon Herb Version
Add 1 tablespoon of lemon zest to the cream sauce, replace parsley with fresh dill, and finish with a generous squeeze of lemon. Lighter and brighter — perfect for spring and summer.
🥦 Loaded Veggie Version
Add 1 cup of baby spinach, ½ cup of sun-dried tomatoes (drained), and ½ cup of frozen peas to the skillet when you add the cream. They cook through in the sauce without needing any extra steps. You now have a one-pan complete meal.
🥛 Lighter Version (For the Calorie-Conscious)
Substitute heavy cream with full-fat coconut cream (unsweetened) — it provides a similar richness with a faint tropical note that actually works beautifully with shrimp. No compromise on texture.
How to Serve This Skillet — And What to Pair It With
This dish is a complete meal in one pan, but a few thoughtful additions take it from great to genuinely memorable.
- Crusty bread — Non-negotiable. You need something to mop up the sauce. A warm baguette or sourdough is the move.
- Simple green salad — The richness of the cream sauce craves something fresh alongside it. Arugula with lemon and olive oil is perfect.
- Dry white wine — A glass of Pinot Grigio or Sauvignon Blanc cuts through the cream beautifully. Cook with it, drink with it, repeat.
- Roasted asparagus or broccolini — Lay them on a sheet pan, roast at 425°F for 12 minutes while the rice cooks. Done.
Storage, Reheating & Meal Prep
This skillet meal is a meal-prepper’s dream — it reheats beautifully and gets better as the flavors meld overnight.
- Fridge: Store in an airtight container for up to 3 days. The rice will absorb the remaining sauce as it sits — this is normal and delicious.
- Freezer: Not recommended for the shrimp (texture suffers). If freezing, remove shrimp first and freeze rice/sauce separately for up to 2 months.
- Reheating: Add 2–3 tablespoons of chicken broth or cream to loosen the sauce. Reheat gently in a covered skillet over low heat, stirring occasionally. Microwave works but reheat at 60% power in 90-second intervals to avoid overcooking the shrimp.
*As an Amazon Associate, we earn from qualifying purchases.
The Science of Why Garlic Makes Everything Better (Seriously)
You might wonder: why does garlic in butter taste so dramatically different from raw garlic? The answer is chemistry — and it’s genuinely fascinating. When garlic is heated in fat, the sulfur compounds responsible for its sharp bite break down and transform into over 50 new flavor compounds, including sweetness-producing sugars and savory glutamates.
According to food science from Serious Eats’ Food Lab, the Maillard reaction begins when garlic reaches around 280°F — which is exactly what happens in butter over medium heat for about 60–90 seconds. Any longer and the garlic tips into bitter territory. Any shorter and it hasn’t had time to develop its sweetness. Those 90 seconds in the recipe are precise. And now you know exactly why.
📋 Printable Recipe Card
Ingredients
- 1.5 lbs (680g) large shrimp, peeled and deveined
- 1½ cups long-grain white rice
- 3 cups good-quality chicken broth
- 1 cup heavy cream
- 6 garlic cloves, finely minced
- 1 medium shallot, finely diced
- 3 tbsp unsalted butter
- 2 tbsp olive oil
- ½ cup freshly grated Parmesan
- 1 tsp smoked paprika
- ½ tsp red pepper flakes (adjust to taste)
- Salt and freshly cracked black pepper to taste
- Fresh parsley, chopped (to serve)
- 1 lemon, cut into wedges (to serve)
Instructions
- Season shrimp: Pat shrimp completely dry. Season with paprika, red pepper flakes, salt, and black pepper. Toss to coat.
- Sear shrimp: Heat olive oil in a large (12″) skillet over high heat until shimmering. Add shrimp in a single layer. Cook 90 seconds per side until pink with a golden crust. Remove to a plate. Do not discard pan juices.
- Build aromatic base: Reduce to medium heat. Add butter to the same pan. Add shallot; cook 1 minute. Add garlic; cook 60 seconds, stirring constantly.
- Toast rice: Add uncooked rice to the skillet. Stir continuously for 90 seconds until rice turns slightly translucent at the edges and is coated in the butter-garlic base.
- Simmer: Pour in chicken broth. Stir once, scraping the bottom. Bring to a boil, then reduce to lowest simmer. Cover tightly. Cook 16–18 minutes until all liquid is absorbed. Do not lift lid during cooking.
- Add cream & Parmesan: Fluff rice gently with a fork. Stir in heavy cream and Parmesan. Simmer uncovered 2 minutes, stirring gently, until sauce thickens. Season with salt and pepper.
- Return shrimp: Nestle seared shrimp into the skillet. Cover and warm 1–2 minutes. Rest 2 minutes before serving.
- Serve: Garnish with fresh parsley and lemon wedges. Serve directly from the skillet with crusty bread alongside.
Nutrition (per serving)
*As an Amazon Associate, we earn from qualifying purchases. Prices may vary.
Frequently Asked Questions
Absolutely — frozen shrimp work perfectly here. Thaw overnight in the refrigerator, or place in a colander under cold running water for 5 minutes. The critical step is patting them completely dry before seasoning. Moisture is the enemy of a good sear.
You can use full-fat coconut cream for a dairy-free version — it provides similar richness. Half-and-half works but will produce a thinner, less stable sauce that can break more easily. Evaporated milk is a lighter option that holds its texture better than half-and-half. For a truly light version, use ¾ cup of broth and ¼ cup of cream.
Three likely culprits: (1) You used the wrong rice variety — short-grain and medium-grain release more starch and become gluey. Always use long-grain white rice. (2) You lifted the lid during cooking and released steam. (3) Your simmer was too high — it should be the absolute lowest possible flame.
Yes — with a smart split strategy. Cook the rice base (through step 5) up to 24 hours ahead and refrigerate. When guests arrive, warm the rice over medium-low, stir in the cream and Parmesan, sear fresh shrimp, and finish the dish in under 12 minutes. It looks completely effortless and dinner-party worthy.
Stir in baby spinach, cherry tomatoes, frozen peas, or sun-dried tomatoes when you add the cream — they cook through in the sauce without needing any extra steps. For a heartier version, top with crispy breadcrumbs (panko toasted in butter) for a textural contrast that’s absolutely phenomenal.
Yes! Scallops work brilliantly with the same two-stage technique. Diced chicken thighs (not breast — too lean) are excellent but will need a longer sear (4–5 minutes per side). Salmon chunks also work beautifully — just be even more gentle when returning them to the skillet so they don’t break apart.
Final Thoughts — Make This Tonight
If there’s one recipe I’d recommend to anyone trying to upgrade their weeknight cooking without learning complicated techniques or buying specialized ingredients, it’s this one. The Creamy Garlic Shrimp Rice Skillet hits every note: it’s fast, it’s deeply flavorful, it’s visually stunning right out of the pan, and it requires exactly one pan to wash.
The secrets aren’t complicated — dry your shrimp, toast your rice, don’t touch that lid, and grate your own Parmesan. Four things. Do those four things and you will have a dinner that genuinely impresses, every single time.
I genuinely can’t wait for you to try it. When you do, leave a star rating below, drop a comment telling me which variation you went with, and — if the photos turn out well — tag us on Pinterest or Instagram. A perfectly sauced shrimp skillet deserves to be seen.